Dubai Chocolate Bars (4 Ways) Recipe
Introduction
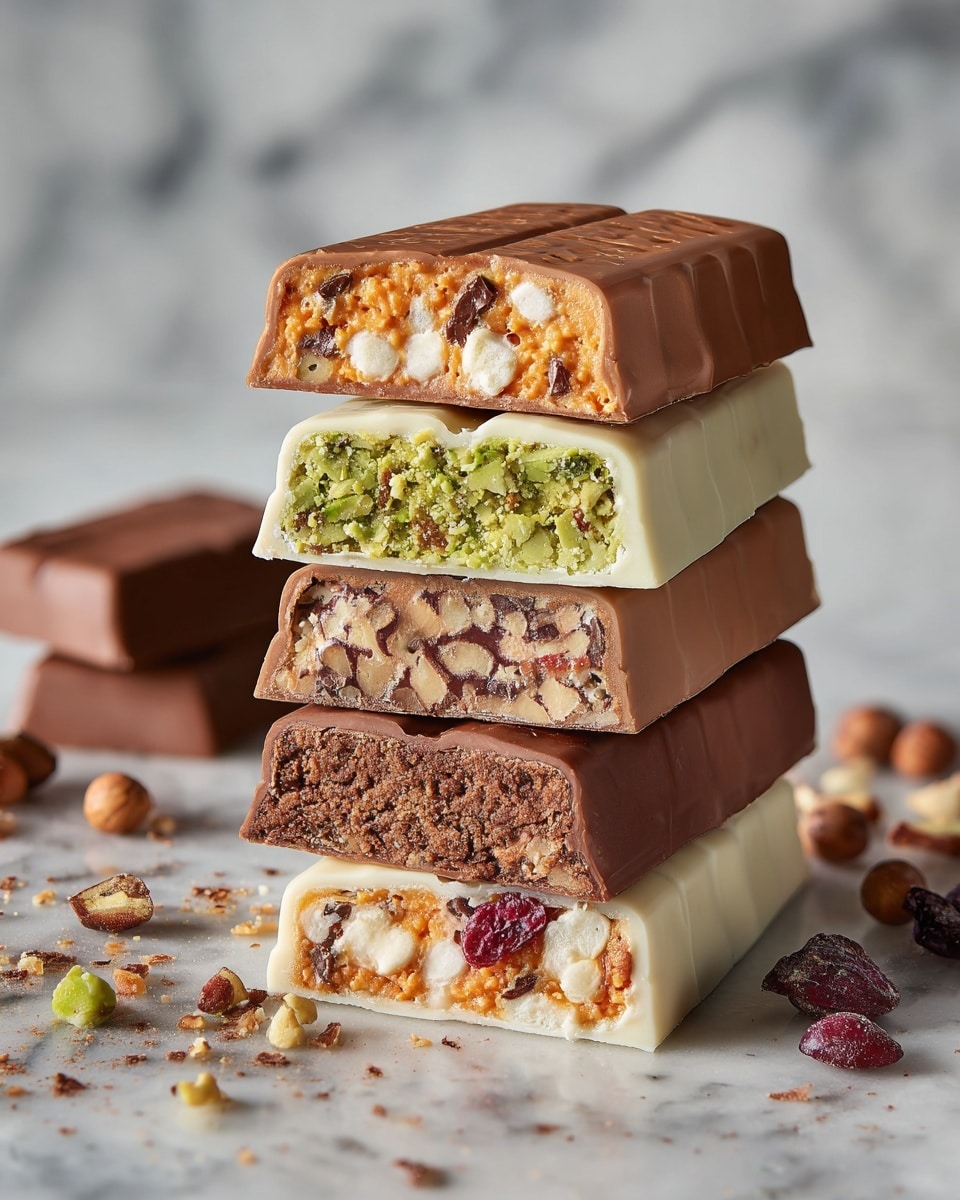
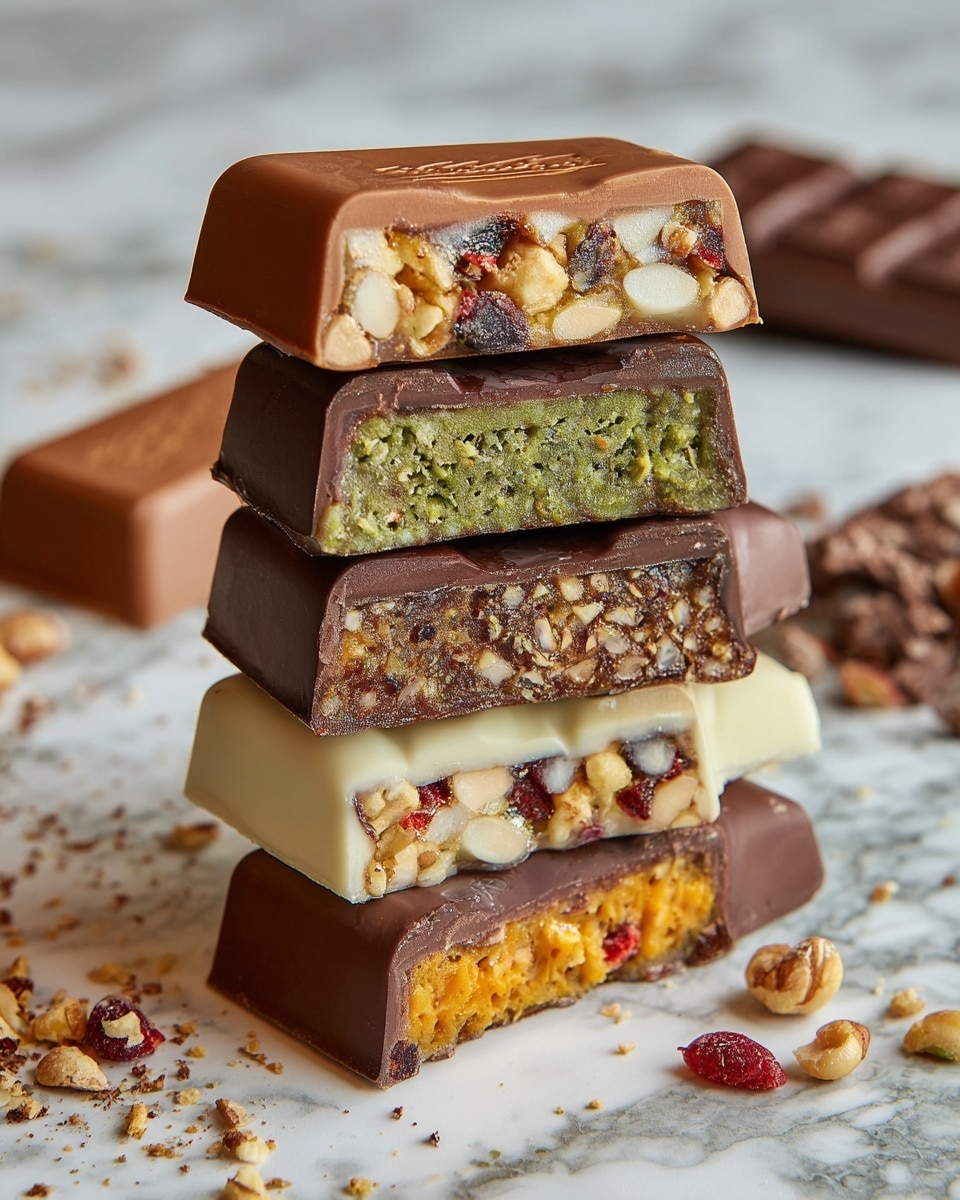
Dubai Chocolate Bars offer a delicious twist on classic chocolate treats with four unique filling options that bring together crunchy, creamy, and nutty flavors. This quick 30-minute recipe is perfect for impressing guests or indulging in a special homemade dessert.
Ingredients
- 16 oz milk or semi-sweet chocolate bar or chocolate chips (white chocolate for the biscoff version)
- 1 cup kataifi or phyllo dough (chopped)
- 2 tablespoons butter
- 1 cup pistachio cream
- 1 cup pretzels (chopped or crushed)
- 1 cup peanut butter
- ¼ cup jelly (optional, for layering only)
- 1 cup biscoff cookies (chopped or crushed, about 14 cookies)
- 1 cup biscoff or cookie butter
- 1 cup toasted phyllo, kataifi, or crushed Oreos
- ½ cup hazelnuts (roasted and chopped, optional)
- 1 cup Nutella
Instructions
- Step 1: Melt the chocolate by chopping it into small pieces and microwaving in 30-second intervals for about 90 seconds. Stir gently between intervals until smooth and melted, taking care not to overheat or cause the chocolate to seize.
- Step 2: Pour a little more than half the melted chocolate into chocolate molds, tilting and moving the molds to coat all sides evenly. Let the excess chocolate drip back into the bowl. Place the molds in the freezer while preparing the filling.
- Step 3: Toast the phyllo or kataifi dough in a large pan over medium heat with the butter, stirring occasionally until golden brown and crispy. Transfer to a mixing bowl and stir in the pistachio cream.
- Step 4: Remove the molds from the freezer. Choose your filling combination—pretzels, peanut butter with jelly layered on top, biscoff cookies with biscoff butter, or toasted phyllo with hazelnuts and Nutella. Combine the filling ingredients in a small bowl and fill the molds evenly.
- Step 5: Drizzle the remaining melted chocolate over the fillings and smooth the tops with an offset spatula. Return molds to the freezer to set for about 5 minutes.
- Step 6: Carefully remove the chocolate bars from the molds and enjoy your homemade Dubai Chocolate Bars.
Tips & Variations
- Use white chocolate for a sweeter biscoff bar variation offering a lovely contrast to the cookie butter filling.
- For an extra crunch, sprinkle chopped nuts or crushed pretzels on top before the final chocolate layer sets.
- If kataifi dough is unavailable, substitute with finely chopped phyllo dough or crushed Oreos for texture variety.
- Store the jelly separately if making peanut butter and jelly bars, to add just before eating and keep the chocolate crisp.
Storage
Store the chocolate bars in an airtight container in the refrigerator for up to one week. To enjoy, bring them to room temperature for 10–15 minutes before serving to soften slightly. Avoid freezing chocolate bars as this can cause texture changes.
How to Serve
Serve this delicious recipe with your favorite sides.
FAQs
Can I use other types of chocolate?
Yes, you can use dark chocolate or white chocolate depending on your taste preference. Just adjust the sweetness and pairing according to the filling flavors.
How do I prevent the chocolate from melting too quickly after making the bars?
Keep the bars refrigerated until ready to serve and handle them with clean, dry hands. Serving in a cool environment helps maintain their shape and texture.
PrintDubai Chocolate Bars (4 Ways) Recipe
Discover the delightful Dubai Chocolate Bars recipe made in four delicious variations, combining smooth melted chocolate with crunchy, creamy, and nutty fillings. This quick 30-minute treat features layers of chocolate with unique ingredients like toasted phyllo dough, pistachio cream, pretzels, peanut butter with jelly, biscoff cookies, and Nutella, all set in chocolate molds for an indulgent and easy-to-make dessert.
- Prep Time: 15 minutes
- Cook Time: 15 minutes
- Total Time: 30 minutes
- Yield: 4 servings 1x
- Category: Dessert
- Method: Stovetop
- Cuisine: Middle Eastern
Ingredients
Chocolate Base
- 16 oz milk or semi-sweet chocolate bar or chocolate chips (white chocolate for the biscoff version)
Phyllo & Fillings
- 1 cup kataifi or phyllo dough (chopped)
- 2 tablespoons butter
- 1 cup pistachio cream
- 1 cup pretzels (chopped or crushed)
- 1 cup peanut butter
- ¼ cup jelly (optional, for layering, do not mix in)
- 1 cup biscoff cookies (chopped or crushed, about 14 cookies)
- 1 cup biscoff or cookie butter
- 1 cup toasted phyllo, kataifi, or crushed Oreos
- ½ cup hazelnuts (roasted and chopped, optional)
- 1 cup Nutella
Instructions
- Melt Chocolate: Chop the chocolate into small pieces and microwave in 30-second intervals for about 90 seconds total. Stir gently between intervals until the chocolate is fully melted and smooth, being careful not to overheat or cause it to seize.
- Fill Mold: Pour slightly more than half of the melted chocolate into chocolate molds, gently tilting the molds to cover all sides and corners evenly. Let excess chocolate drip back into the bowl. Place the molds in the freezer to set while preparing the fillings.
- Toast Phyllo: Heat a large heavy-duty pan over medium heat. Add chopped kataifi or phyllo dough and butter, stirring occasionally until it turns golden brown and crispy. Transfer toasted phyllo to a mixing bowl and combine with pistachio cream for one filling variation.
- Assemble: Remove molds from the freezer. Prepare chosen filling by combining ingredients in small bowls (for peanut butter filling, layer jelly separately, do not mix). Divide filling evenly into the molds over the chocolate base. Drizzle remaining melted chocolate on top and smooth with an offset spatula. Return mold to the freezer for about 5 minutes to set. Carefully remove the finished chocolate bars from the molds and enjoy.
Notes
- Use white chocolate when making the biscoff cookie variation for best flavor and appearance.
- When melting chocolate, avoid overheating to prevent burning or seizing.
- Layer jelly on top of peanut butter instead of mixing for texture contrast.
- Toast phyllo or kataifi carefully to a golden crisp but not burnt for optimal crunch.
- Ensure chocolate molds are fully set before removing chocolate bars to avoid breakage.
Keywords: Dubai Chocolate Bars, chocolate bars, kataifi dessert, phyllo dough dessert, pistachio cream, biscoff cookies, Nutella treat, peanut butter chocolate, quick dessert