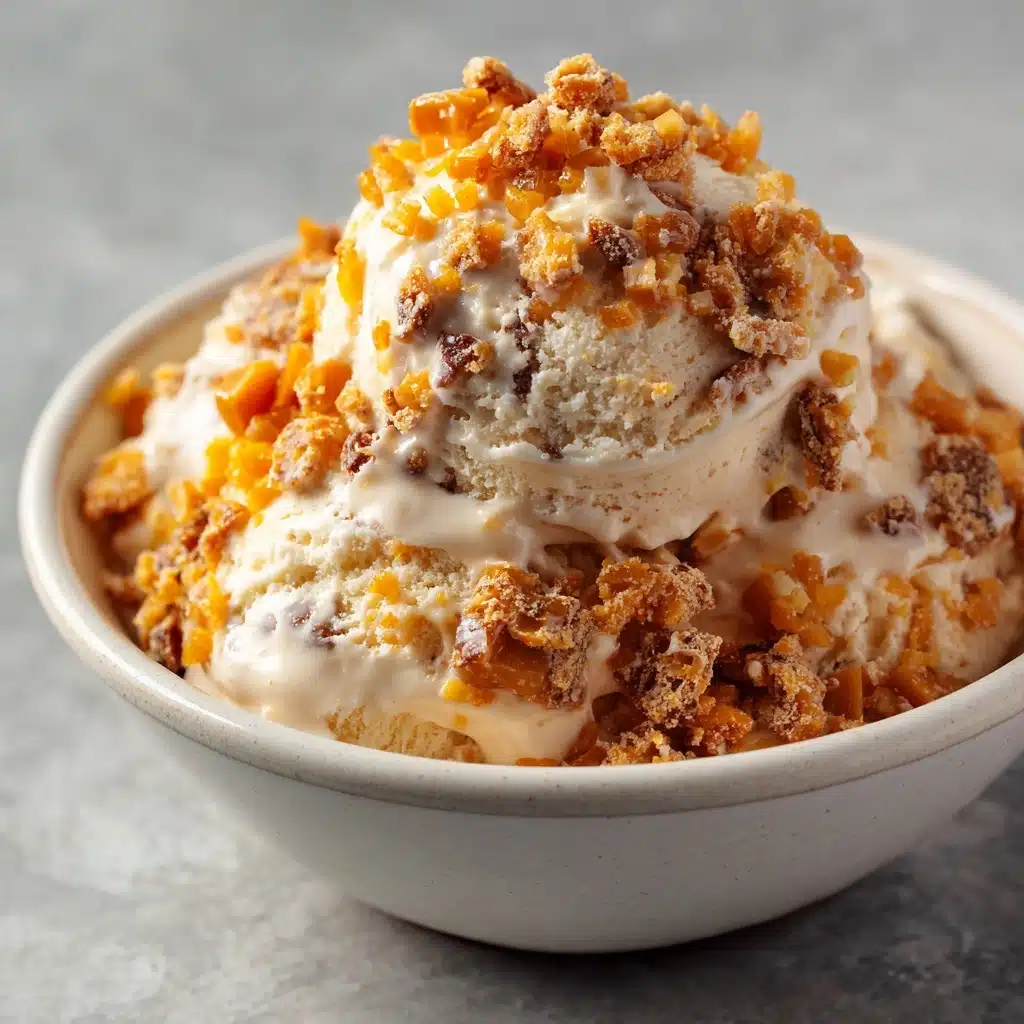
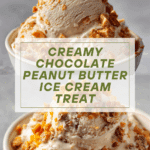
Chocolate Peanut Butter Ninja Creami Recipe
If you’re on the hunt for a dessert that seamlessly blends the all-time favorite flavors of chocolate and peanut butter into a luscious, scoopable treat, look no further than this Chocolate Peanut Butter Ninja Creami. Imagine the velvet richness of cream and the dreamy duo of cocoa and nutty goodness, all transformed by the magic of your Ninja Creami machine. Whether you’re crafting a sundae for a cozy movie night or treating friends to a delightfully easy homemade ice cream, you’ll fall for every silky, decadent bite of this creation.

Ingredients You’ll Need
The beauty of Chocolate Peanut Butter Ninja Creami lies in its simple yet well-chosen ingredients. Every element earns its place, working together to create the ultimate cool and creamy experience that hits all your sweet and salty cravings at once.
- Cream cheese: Adds an ultra creamy texture and subtle tang, ensuring a smooth, scoopable base.
- Sugar: Sweetens the mixture just right and helps create that soft, classic ice cream texture.
- Peanut butter powder: Delivers concentrated peanut flavor without added oiliness, for pure nutty depth.
- Cocoa powder: Brings that essential chocolate richness, making each bite satisfyingly fudgy.
- Vanilla extract: Enhances both the chocolate and peanut butter flavors, tying everything together.
- Milk: Provides lightness and helps the ice cream churn to a perfectly creamy consistency.
- Heavy cream: The secret to that dreamy thickness and body, giving the final treat its luxurious mouthfeel.
How to Make Chocolate Peanut Butter Ninja Creami
Step 1: Warm and Whisk the Base
Start by placing your cream cheese in a large, microwave-safe bowl and zap it for just 15 seconds. This magic little trick softens the cream cheese, making it easy to blend. Add your sugar, peanut butter powder, cocoa powder, and vanilla extract to the bowl. Whisk everything together until it’s completely smooth—no lumps allowed! This step ensures your Chocolate Peanut Butter Ninja Creami will have that signature velvety foundation.
Step 2: Add the Dairy
Pour in your milk and heavy cream. Take a minute to whisk it thoroughly—this is where everything starts to come together. The mixture will look slightly thick and rich, which is exactly what you want. Make sure no streaks of cocoa or peanut butter remain for the smoothest possible ice cream.
Step 3: Freeze It Right
Carefully transfer your chocolate peanut butter mixture into a Ninja Creami pint—it should fill just up to the max fill line. Pop the lid on and settle it into your freezer, where the magic happens. You’ll need to freeze it for a minimum of 24 hours, so a little patience goes a long way here. This deep freeze is absolutely crucial for that scoopable, creamy texture later on.
Step 4: Creamify!
Once your base is thoroughly frozen, remove it from the freezer and place it into the Ninja Creami. Use the ice cream setting to process it into pure, decadent bliss. If it looks a little crumbly after the first spin, don’t stress—just add a splash of milk and reprocess. In moments, you’ll have that luscious Chocolate Peanut Butter Ninja Creami texture you crave.
Step 5: Level Up with Mix-Ins (Optional)
If you want to take your Chocolate Peanut Butter Ninja Creami experience over the top, make a well in the center of your creamy pint, add your favorite mix-ins—think chocolate chips, roasted peanuts, or peanut butter cups—and use the machine’s mix-in setting. Every spoonful becomes a new adventure of crunchy, chewy delight!
How to Serve Chocolate Peanut Butter Ninja Creami
Garnishes
Go wild with toppings that complement the chocolate and peanut butter medley. Think chopped roasted peanuts, a drizzle of chocolate or caramel sauce, a sprinkle of flaky sea salt, or even classic mini chocolate chips. A few fresh banana slices or a dollop of whipped cream can make every bowl feel like a celebration.
Side Dishes
Pair your Chocolate Peanut Butter Ninja Creami with crispy wafer cookies or buttery shortbread for a delightful textural contrast. If you want to keep it classic, serve alongside a warm brownie or a freshly baked peanut butter cookie. Coffee or a tall glass of cold milk? Always a yes to round out this sweet indulgence.
Creative Ways to Present
For parties or special occasions, scoop your Ninja Creami into mini cones or bowls for a sampler-style dessert bar. Layer it into parfait glasses with crumbled cookies and chocolate sauce, or sandwich scoops between chewy peanut butter cookies for the ultimate ice cream sandwiches. Kids and adults alike will love building their own chocolate-peanut butter masterpieces!
Make Ahead and Storage
Storing Leftovers
If you (miraculously) have leftovers, pop the lid back on your Ninja Creami pint and stash it in the freezer. It’ll keep for up to two weeks, though the texture is always best if enjoyed sooner rather than later. Before serving, let it sit at room temperature for a few minutes to soften just right.
Freezing
This recipe is tailor-made for freezing, and the mixture will stay beautifully scoopable thanks to the creamy base. If you’re batching ahead for a party or prepping a few different flavors, just label your pints and keep them tightly sealed to avoid freezer odors or ice crystals.
Reheating
While reheating isn’t needed, if your Chocolate Peanut Butter Ninja Creami feels too firm straight from the freezer, let it rest on the counter for 5 to 10 minutes. This softening time will bring back its irresistible creamy texture, making scooping a breeze (and saving your wrists from a workout).
FAQs
Do I have to use peanut butter powder, or can I substitute regular peanut butter?
Peanut butter powder works beautifully for a concentrated flavor without altering the creamy texture, but creamy peanut butter can be used if that’s all you have on hand—just know the final ice cream might be a touch denser.
Can I use plant-based milk or vegan cream cheese for a dairy-free version?
Absolutely! Swap in your favorite unsweetened plant milk and a dairy-free cream cheese. The creamiest results usually come from using oat or cashew milk and coconut cream, though the flavor and texture will change a bit.
What can I add as mix-ins to my Chocolate Peanut Butter Ninja Creami?
Classic options include chopped peanuts, bits of peanut butter cups, mini chocolate chips, or ribbons of fudge. Don’t be afraid to experiment—swirls of raspberry jam or pretzel bits can be a revelation.
How do I prevent the ice cream from getting icy or hard?
Follow the freezing instructions carefully, and always use the recommended proportions of cream and sugar; both ingredients play a crucial role in a soft, creamy scoop. If needed, add a splash of milk and re-spin to restore the perfect texture.
Can I double the recipe if I have more than one Ninja Creami pint?
Yes! Just scale up the ingredients and divide the mixture into separate pints for freezing. Each pint should still be processed individually for the creamiest results.
Final Thoughts
If you’ve been searching for a dessert that wows every time, this Chocolate Peanut Butter Ninja Creami is ready to become your new obsession. Trust me, it’s easy, endlessly customizable, and so supremely decadent that you’ll wonder how you ever lived without it. Give it a whirl in your kitchen—you’ll see just how magical homemade ice cream can be!
PrintChocolate Peanut Butter Ninja Creami Recipe
Indulge in the creamy, dreamy goodness of this Chocolate Peanut Butter Ninja Creami recipe. With a rich blend of flavors and a silky texture, this homemade ice cream is a delightful treat for any occasion.
- Prep Time: 10 minutes
- Cook Time: 0 minutes
- Total Time: 24 hours 10 minutes
- Yield: Approximately 1 pint of ice cream 1x
- Category: Dessert
- Method: Churning, Freezing
- Cuisine: American
- Diet: Vegetarian
Ingredients
Ice Cream Base:
- 1 Tablespoon cream cheese
- 1/3 cup sugar
- 2 Tablespoons peanut butter powder
- 1 Tablespoon cocoa powder
- 1 teaspoon vanilla extract
- 1 cup milk
- 3/4 cup heavy cream
Instructions
- Melt the Cream Cheese: Place cream cheese in a microwave-safe bowl and heat for 15 seconds until slightly softened.
- Mix Dry Ingredients: Add sugar, cocoa powder, peanut butter powder, and vanilla extract to the bowl with the cream cheese. Stir until well combined.
- Add Liquid Ingredients: Pour in the milk and heavy cream. Whisk everything together until smooth.
- Freeze Mixture: Transfer the ice cream base to the Creami pint and freeze for a minimum of 24 hours.
- Churn Ice Cream: Remove the frozen mixture, process it in the Creami on the ice cream setting. If needed, adjust the consistency by adding a splash of milk and reprocessing.
- Add Mix-Ins: Optional – Create a well in the center of the ice cream, add mix-ins, and use the mix-in feature on the Creami.
Notes
- You can customize this recipe by adding chopped nuts, chocolate chips, or caramel swirls as mix-ins.
- For a smoother texture, ensure the ice cream base is well-chilled before churning.
Nutrition
- Serving Size: 1/2 cup
- Calories: 220
- Sugar: 15g
- Sodium: 80mg
- Fat: 15g
- Saturated Fat: 9g
- Unsaturated Fat: 6g
- Trans Fat: 0g
- Carbohydrates: 20g
- Fiber: 1g
- Protein: 4g
- Cholesterol: 45mg
Keywords: Chocolate Peanut Butter Ninja Creami, Homemade Ice Cream, Creamy Ice Cream Recipe
