Sweet Chilli Sauce with Fresh Chillies Recipe
Introduction
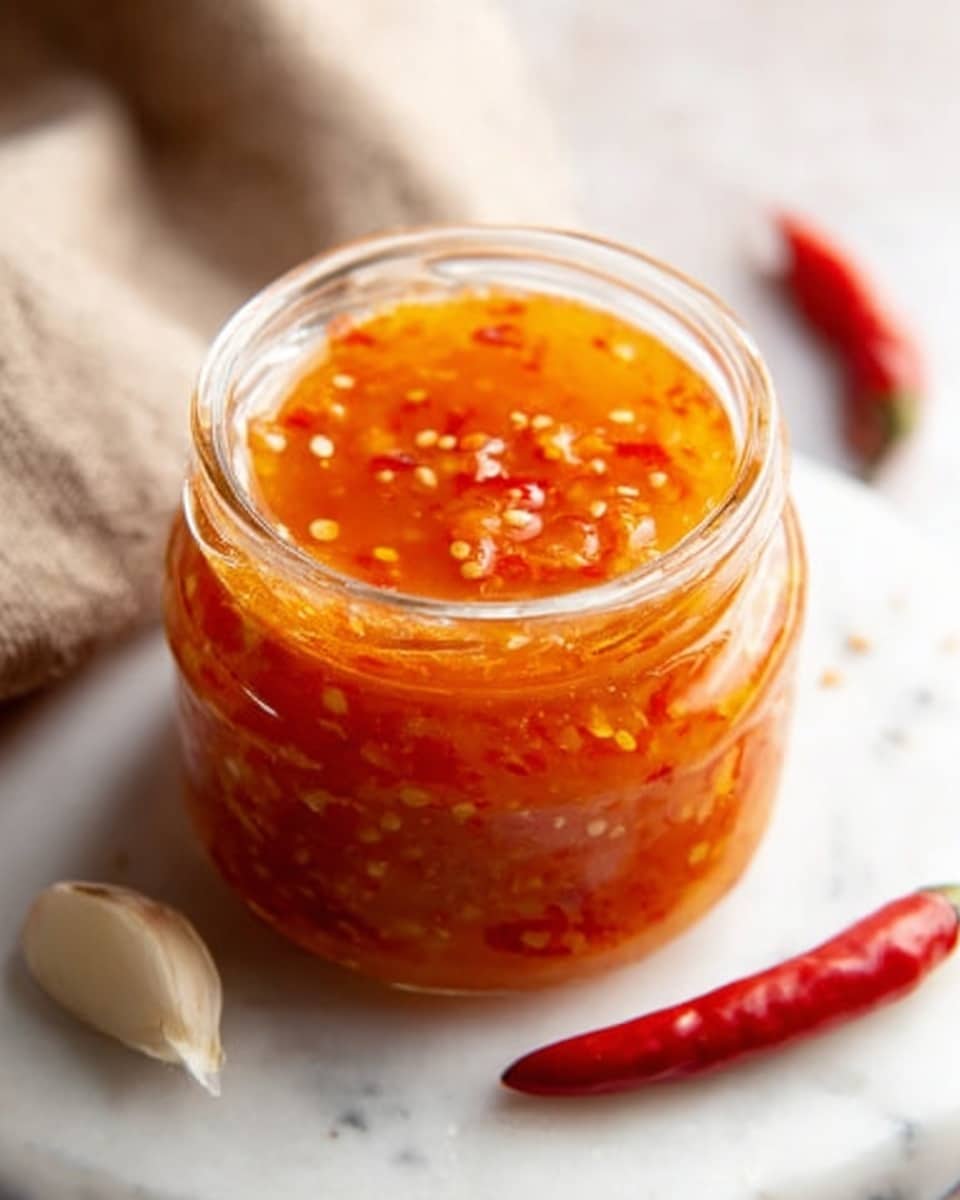
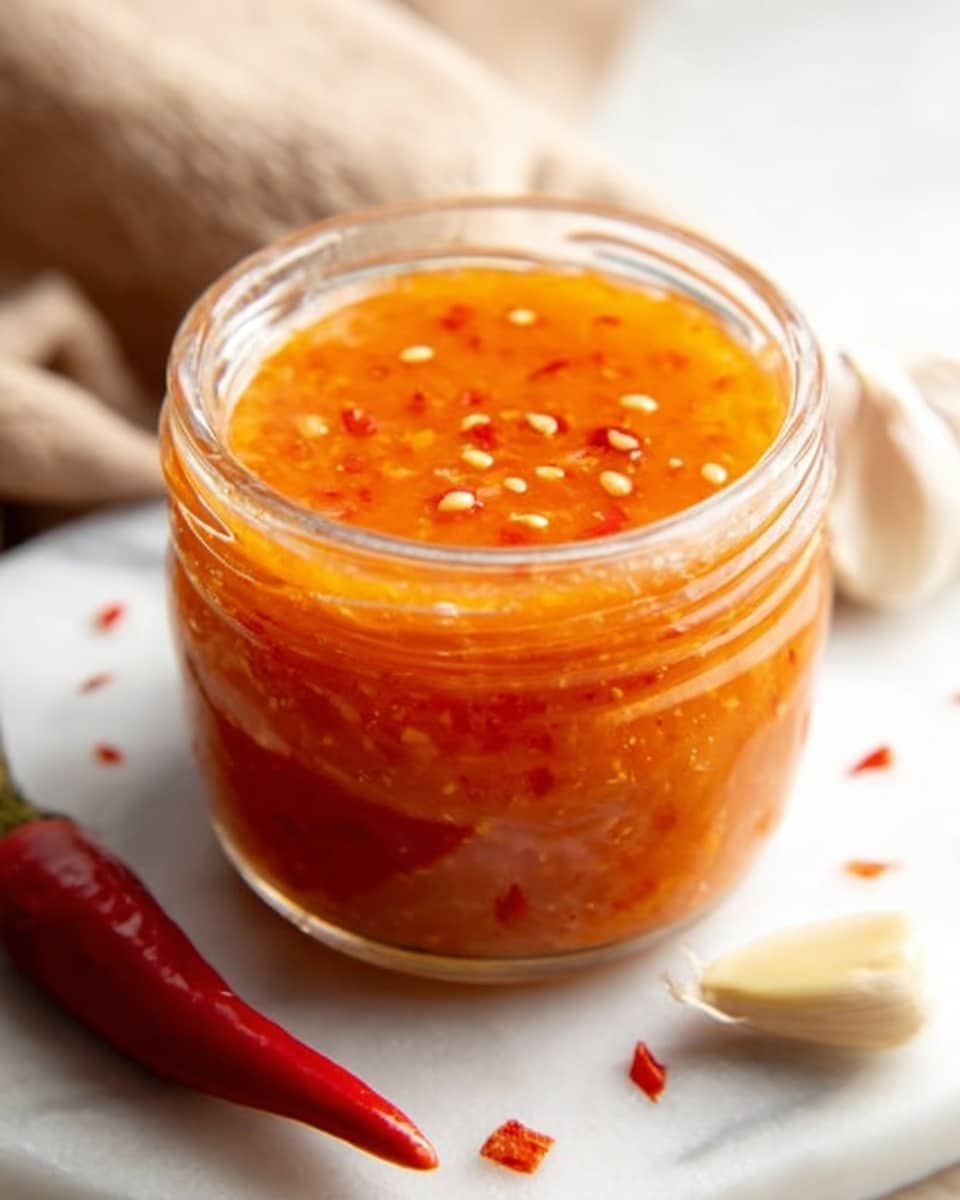
Sweet chilli sauce is a versatile and flavorful condiment that adds a perfect balance of heat and sweetness to any dish. Made with fresh chillies and a simple blend of ingredients, this homemade version is quick to prepare and far tastier than store-bought alternatives.
Ingredients
- 80 grams red chilli pepper (about 2.8 oz / ½ cup) or 2-3 tbsp dried crushed chilli flakes
- 120 ml distilled white vinegar (about ½ cup)
- 100 grams sugar (about ½ cup)
- 120 ml water (about ½ cup)
- 2 tbsp garlic (minced)
- 1 tsp salt
- 1 tbsp cornstarch mixed with 2 tbsp water (cornstarch slurry)
Instructions
- Step 1: If using fresh red chillies, blend the chillies, minced garlic, and water in a food processor until roughly chopped to create the base for the sauce. Skip this step if using dried chilli flakes.
- Step 2: Transfer the blended mixture to a pot or saucepan. If using dried chilli flakes, add them directly to the pot along with garlic, water, and other ingredients.
- Step 3: Add sugar, distilled white vinegar, and salt to the pot and stir to combine.
- Step 4: Heat the mixture on the stovetop, bring to a simmer, and cook for 4 to 5 minutes, stirring occasionally until the sugar has completely dissolved.
- Step 5: Stir in the cornstarch slurry and continue cooking while stirring constantly for a few minutes until the sauce thickens to a syrupy consistency.
- Step 6: Remove the sauce from heat and let it cool completely before transferring to a clean jar or container.
Tips & Variations
- Adjust the spiciness by using more or fewer chillies or by mixing fresh chillies with dried flakes.
- For a smoother texture, strain the sauce after simmering to remove chilli seeds and skins.
- Add a splash of lime juice for a tangier twist.
- Use brown sugar instead of white sugar for a richer flavor.
Storage
Store the sweet chilli sauce in a clean airtight jar in the refrigerator. It will keep well for up to 2 weeks. Reheat gently before serving if it thickens too much after cooling.
How to Serve
Serve this delicious recipe with your favorite sides.
FAQs
Can I use different types of chillies for this sauce?
Yes, you can experiment with different varieties of chillies depending on your preferred heat level and flavor. Just adjust the quantity accordingly.
How long does the sauce last once refrigerated?
The sauce can be stored in the refrigerator for up to 2 weeks. Make sure to keep it in a clean, airtight container to maintain freshness.
PrintSweet Chilli Sauce with Fresh Chillies Recipe

A vibrant and tangy Sweet Chilli Sauce made from fresh red chillies or dried chilli flakes, combined with garlic, sugar, vinegar, and thickened with cornstarch. This versatile sauce is quick to prepare on the stovetop and perfect for dipping, glazing, or adding a spicy kick to your favorite dishes.
- Prep Time: 5 minutes
- Cook Time: 15 minutes
- Total Time: 20 minutes
- Yield: 1 cup (approximately) 1x
- Category: Sauce
- Method: Stovetop
- Cuisine: Asian
Ingredients
Fresh Chilli Base
- 80 grams Red chilli pepper (About 2.8oz / ½ cup) or 2-3 tbsp dried crushed chilli flakes
- 2 tbsp Garlic (Minced)
- 120 ml Water (About ½ cup)
Sauce Mixture
- 120 ml Distilled white vinegar (About ½ cup)
- 100 grams Sugar (About ½ cup)
- 1 tsp Salt
Thickening Agent
- 1 tbsp Cornstarch mixed with 2 tbsp water (cornstarch slurry)
Instructions
- Prepare Chillies: If using fresh red chillies, blend the chillies, minced garlic, and water in a food processor until roughly chopped to create the base for the sauce. If using dried chilli flakes, skip this step.
- Combine Ingredients: Transfer the blended mixture to a pot, or if using dried chilli flakes, use a saucepan directly and add the chilli flakes. Add sugar, distilled white vinegar, and salt to the pot or saucepan.
- Simmer Sauce: Heat the mixture on the stovetop and bring it to a simmer. Continue simmering and stir occasionally for 4 to 5 minutes until the sugar is completely dissolved.
- Thicken Sauce: Stir in the cornstarch slurry into the simmering sauce. Cook for an additional few minutes while stirring continuously until the sauce slightly thickens to a syrupy consistency.
- Cool and Store: Remove the sauce from heat and allow it to cool completely. Once cooled, pour the sweet chilli sauce into a clean jar or container and store it in the refrigerator for up to 2 weeks.
Notes
- You can adjust the level of spiciness by using more or fewer chillies or dried chilli flakes.
- Use distilled white vinegar for the classic tangy flavor; other types may alter the taste.
- The sauce thickens as it cools, so don’t overcook the cornstarch mixture.
- Store the sauce refrigerated in an airtight container for best freshness and quality.
- This sauce is perfect as a dip, glaze for grilled meats, or a condiment with stir-fry dishes.
Keywords: sweet chilli sauce, homemade chilli sauce, spicy dipping sauce, Asian sauce, sweet and spicy sauce


