Rice Krispie Cookies Recipe
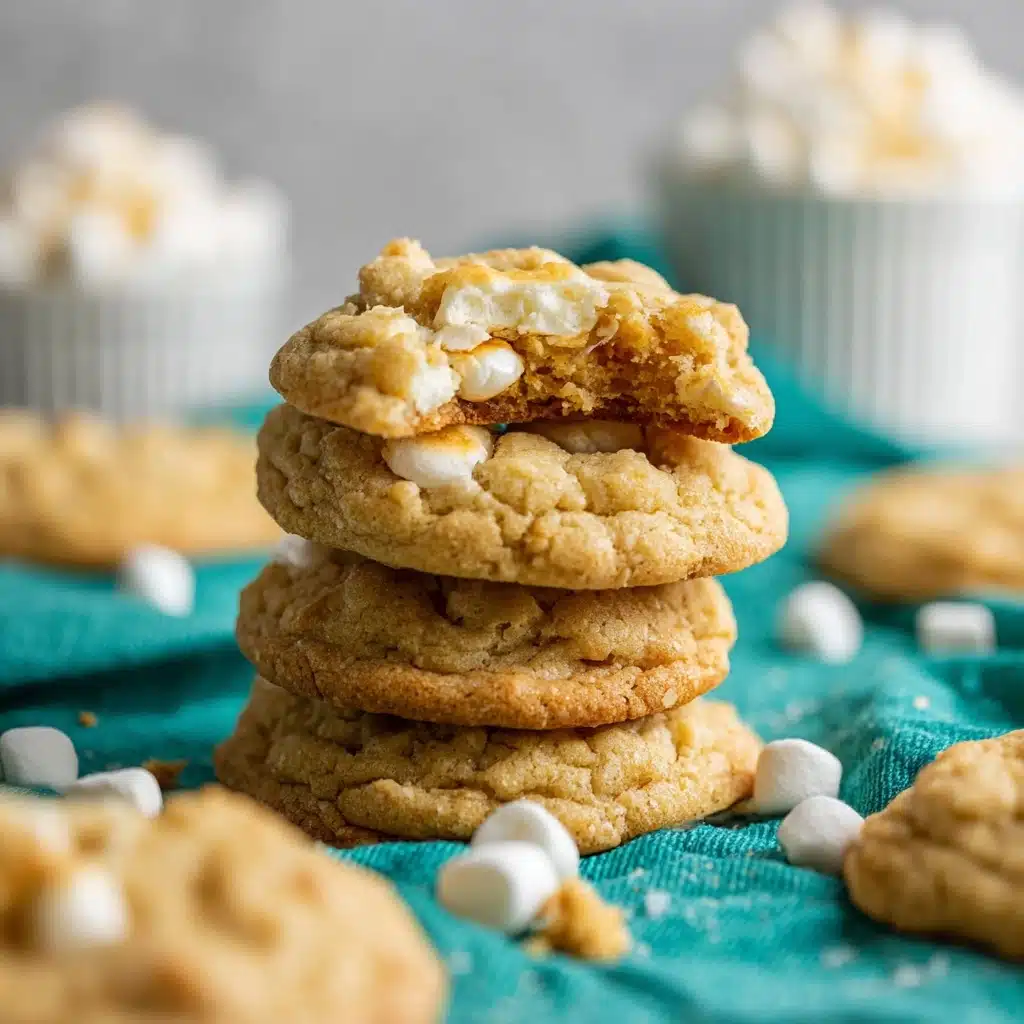
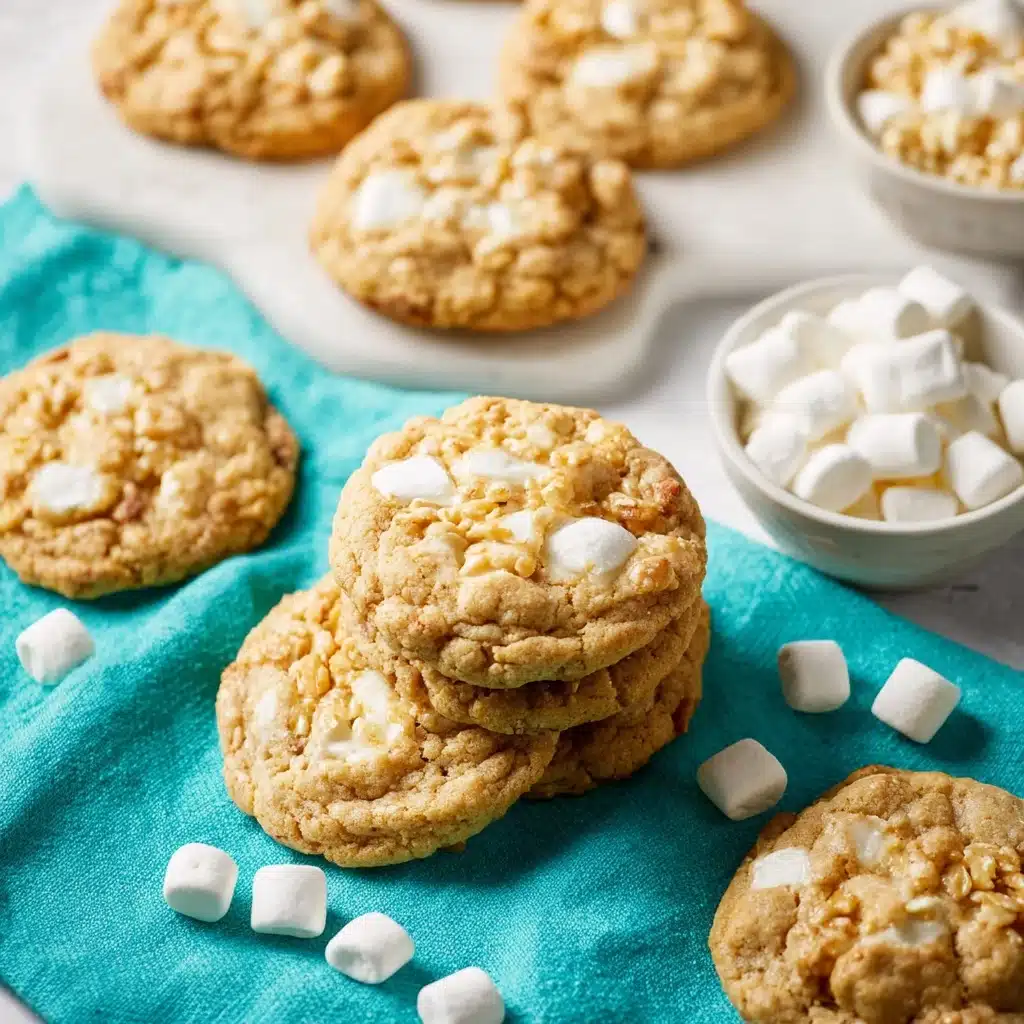
If you’ve been on the hunt for a cookie that’s spectacularly chewy, crispy, and delightfully nostalgic all at once, Rice Krispie Cookies might just be your new obsession. These whimsical treats meld a classic cookie dough base with crunchy rice cereal and gooey pockets of marshmallow, delivering that beloved cereal-and-marshmallow combo in handheld dessert form. They’re impossibly easy to put together, bake up gorgeously golden, and disappear just as quickly from the cookie jar. Whether you’re looking for a fun weekend baking project or a guaranteed crowd-pleaser, Rice Krispie Cookies have you covered with their irresistible charm and satisfying texture in every bite.

Ingredients You’ll Need
This recipe relies on a handful of familiar pantry staples, but each one serves an important role in creating the signature texture and flavor of these Rice Krispie Cookies. Here’s why every ingredient matters:
- Unsalted butter: Provides richness, tender crumb, and classic cookie flavor — make sure it’s softened for easy creaming.
- Light brown sugar: Adds moisture, a touch of chewiness, and a hint of caramel to the cookies.
- Granulated sugar: Contributes to sweetness and promotes those crispy, golden edges.
- Egg + egg yolk: The combination yields an ultra-chewy center with just the right structure.
- Vanilla extract: Brings warmth and aromatic depth, tying all the elements together.
- All-purpose flour: Forms the foundation, giving the cookies structure without making them tough.
- Baking powder: Ensures a little lift and softness.
- Baking soda: Helps the cookies spread just enough while boosting browning.
- Salt: Balances sweetness and sharpens all the flavors — don’t skip it!
- Rice Krispie cereal: The star that brings crunchy magic and signature crispy texture.
- Mini marshmallows: Little pillows that turn gooey and caramelized in the oven, echoing classic cereal treats.
How to Make Rice Krispie Cookies
Step 1: Prep Your Oven and Baking Sheet
Begin by preheating your oven to 350°F (175°C) to ensure even baking from the very first tray. Line your baking sheets with parchment paper to make for easy cleanup and to prevent any melted marshmallow from sticking — trust me, it’s an absolute lifesaver for these cookies!
Step 2: Cream the Butter and Sugars
In a large mixing bowl or the bowl of your stand mixer, beat together the softened butter, light brown sugar, and granulated sugar until the mixture looks pale and fluffy. This not only aerates your dough but ensures your Rice Krispie Cookies bake up with the perfect chewy, yet crisp, edges.
Step 3: Incorporate the Egg, Egg Yolk, and Vanilla
Add your whole egg, extra egg yolk, and vanilla extract right into the creamed butter-sugar blend. Beat until everything is silky and well combined — this extra yolk is the secret to that decadent texture that will have everyone reaching for a second cookie.
Step 4: Whisk and Add Dry Ingredients
In a separate bowl, whisk together the flour, baking powder, baking soda, and salt. Gradually add these dry ingredients to your wet mixture, stirring just until no streaks of flour remain. This method keeps the cookies tender and prevents over-mixing.
Step 5: Fold in Rice Krispies and Marshmallows
Using a spatula, gently fold the rice krispie cereal and mini marshmallows into the cookie dough. Be gentle and patient so the cereal stays crispy and the marshmallows are evenly dispersed — every bite deserves a bit of both!
Step 6: Scoop and Shape Your Cookies
Scoop heaping 3-tablespoon portions of dough (about 54 grams each), then roll them between your palms to form smooth balls. Place these mounds onto your prepared baking sheet, spacing them at least 2 inches apart. This room allows the cookies to spread just right in the oven.
Step 7: Bake to Perfection
Place the baking sheet on the center rack and bake for 13 to 14 minutes, or until the edges of the cookies (not the melted marshmallow) turn lightly golden brown. Don’t overbake; the centers will continue to set as they cool. This is how you get the best balance between crispy and chewy.
Step 8: Tidy Up and Cool
Right out of the oven, if a few cookies look a little wild from the melted marshmallows, gently nudge any runaway marshmallow back toward the center with the back of a spoon. Not mandatory, but it makes for picture-perfect Rice Krispie Cookies! Allow them to cool completely on the baking sheet before transferring — patience pays off.
How to Serve Rice Krispie Cookies

Garnishes
For a bakery-worthy finish, sprinkle a tiny pinch of flaky sea salt over each cookie as soon as they emerge from the oven. If you want to add extra fun, try a drizzle of melted white or dark chocolate, or press a few extra mini marshmallows on top while still warm for extra gooey flair.
Side Dishes
A big glass of cold milk is always the classic companion, but these cookies also pair beautifully with a hot cup of coffee or your favorite tea. For dessert platters, mix them up with brownies or fruit for a playful variety of textures and flavors.
Creative Ways to Present
Arrange Rice Krispie Cookies on a colorful cake stand for a festive party centerpiece, or tuck them into clear cellophane bags tied with ribbon for heartfelt edible gifts. For an extra-indulgent twist, sandwich a scoop of vanilla ice cream between two cookies for a homemade ice cream sandwich everyone will rave about.
Make Ahead and Storage
Storing Leftovers
Keep any extra Rice Krispie Cookies in an airtight container at room temperature. They’ll stay fresh for up to 4 days, retaining both their chewiness and signature crispy bits. To prevent marshmallows from sticking, layer cookies with wax paper if you’re stacking them.
Freezing
For longer storage, freeze cookies in a single layer on a baking tray until firm, then transfer to a zip-top bag or airtight container (separate layers with parchment). They freeze beautifully for up to 2 months. You can also freeze unbaked dough balls and bake fresh when cravings strike!
Reheating
Let frozen cookies thaw at room temperature, or give them a quick zap in the microwave (about 8-10 seconds) to revive that fresh-baked gooeyness. If you love them with a slightly crispy edge, a minute or two in a low oven (around 300°F/150°C) works wonders.
FAQs
Why are my Rice Krispie Cookies spreading too much?
Spreading can happen if your butter is too soft or the dough is too warm. Try chilling the dough for 20-30 minutes before baking to help the cookies keep their shape beautifully.
Can I use regular-sized marshmallows instead of mini?
Mini marshmallows give the most even gooey pockets, but you can chop up regular marshmallows into small bits if that’s what you have on hand — just watch for even distribution in the dough.
Are there mix-in variations I can try?
Absolutely! Feel free to fold in chocolate chips, butterscotch chips, or even shredded coconut for your own twist. Just keep the total amount of add-ins to around the same as the original so the cookies hold together well.
Can Rice Krispie Cookies be made gluten-free?
Yes! Swap in a gluten-free all-purpose flour blend and be sure to use a gluten-free crispy rice cereal. The cookies turn out just as deliciously chewy and crunchy.
What’s the best way to keep these cookies chewy after a day or two?
Seal them tightly in an airtight container and, if you like, pop a slice of sandwich bread in with them to help maintain moisture. This little trick will keep your Rice Krispie Cookies soft and tempting day after day.
Final Thoughts
There’s just something magical about Rice Krispie Cookies that brings people together, cookie after irresistible cookie. I can’t wait for you to try them — they might just become your new go-to treat! Happy baking, and don’t forget to share a batch (or keep them all to yourself, no judgment here!).
PrintRice Krispie Cookies Recipe
These Rice Krispie Cookies are a delightful twist on traditional cookies, featuring the crunch of rice krispies and gooey marshmallows in every bite. Perfect for a sweet treat or a lunchbox snack!
- Prep Time: 20 minutes
- Cook Time: 14 minutes
- Total Time: 34 minutes
- Yield: About 24 cookies 1x
- Category: Dessert
- Method: Baking
- Cuisine: American
- Diet: Vegetarian
Ingredients
For the Cookies:
- 1 cup unsalted butter (softened)
- 1 cup light brown sugar (firmly packed)
- ½ cup granulated sugar
- 1 large egg + 1 egg yolk (room temperature preferred)
- 1 ½ teaspoons vanilla extract
- 2 ¾ cups all-purpose flour
- 1 teaspoon baking powder
- ½ teaspoon baking soda
- 1 teaspoon salt
- 2 cups rice krispie cereal
- 1 ½ cups mini marshmallows
Instructions
- Preheat Oven: Preheat the oven to 350°F (175°C) and line a baking sheet with parchment paper.
- Cream Butter and Sugars: In a large mixing bowl, cream together the butter and sugars until light and fluffy.
- Add Eggs and Vanilla: Beat in the egg, egg yolk, and vanilla extract until well-combined.
- Mix Dry Ingredients: In a separate bowl, whisk together the flour, baking powder, baking soda, and salt.
- Combine Wet and Dry Ingredients: Gradually mix the dry ingredients into the wet mixture until fully combined.
- Add Cereal and Marshmallows: Stir in the rice krispie cereal and mini marshmallows until evenly distributed.
- Shape Cookies: Scoop the dough into 3 tablespoon-sized portions, roll into balls, and place on the baking sheet.
- Bake: Bake in the preheated oven for 13-14 minutes until the edges are lightly golden.
- Cool: Allow the cookies to cool on the baking sheet before serving.
Notes
- If the cookies spread too much during baking, chilling the dough for 30 minutes can help.
Nutrition
- Serving Size: 1 cookie
- Calories: 180
- Sugar: 13g
- Sodium: 160mg
- Fat: 8g
- Saturated Fat: 5g
- Unsaturated Fat: 2g
- Trans Fat: 0g
- Carbohydrates: 25g
- Fiber: 0.5g
- Protein: 2g
- Cholesterol: 30mg
Keywords: Rice Krispie Cookies, Marshmallow Cookies, Dessert Recipe


