No-Churn Mulberry Ice Cream Recipe
Introduction
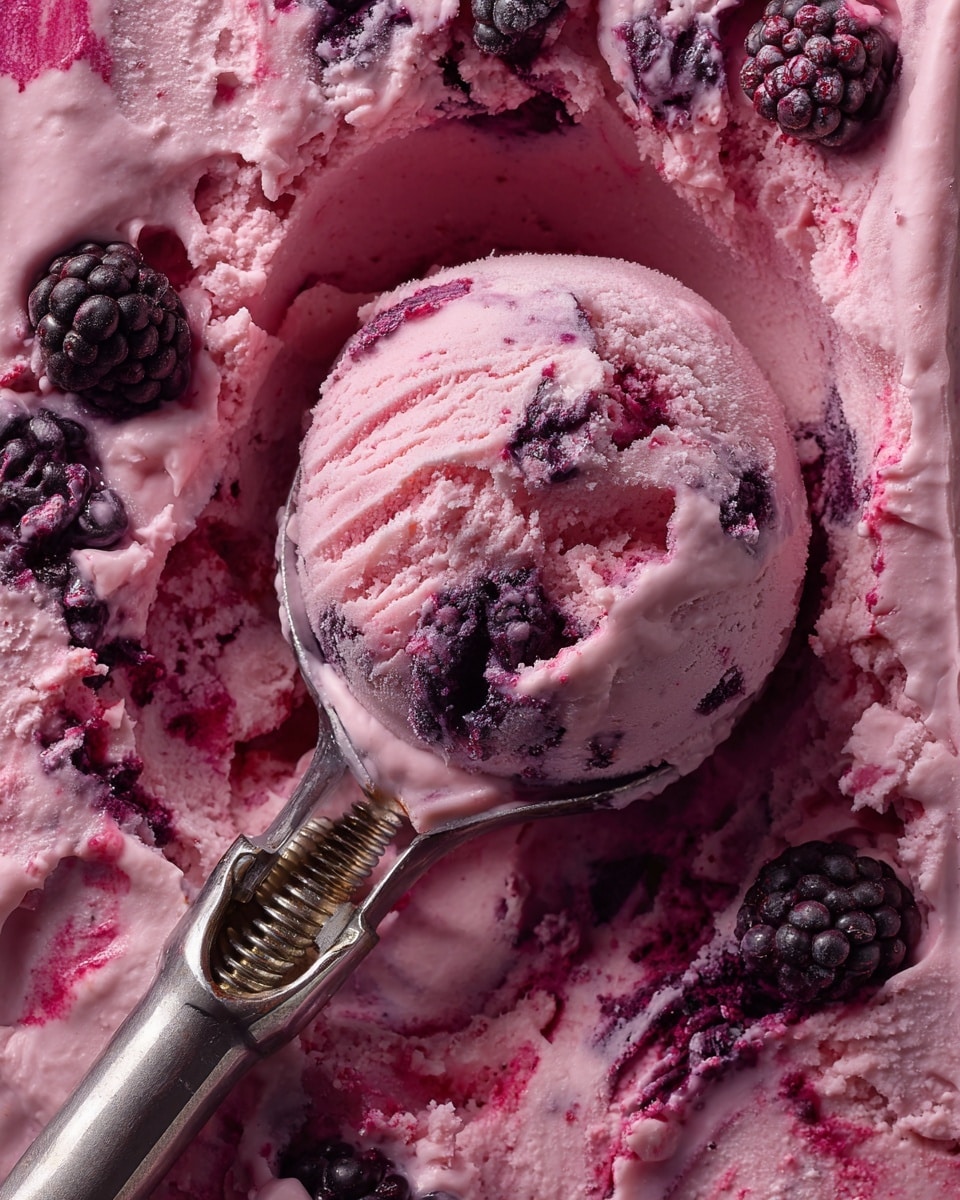
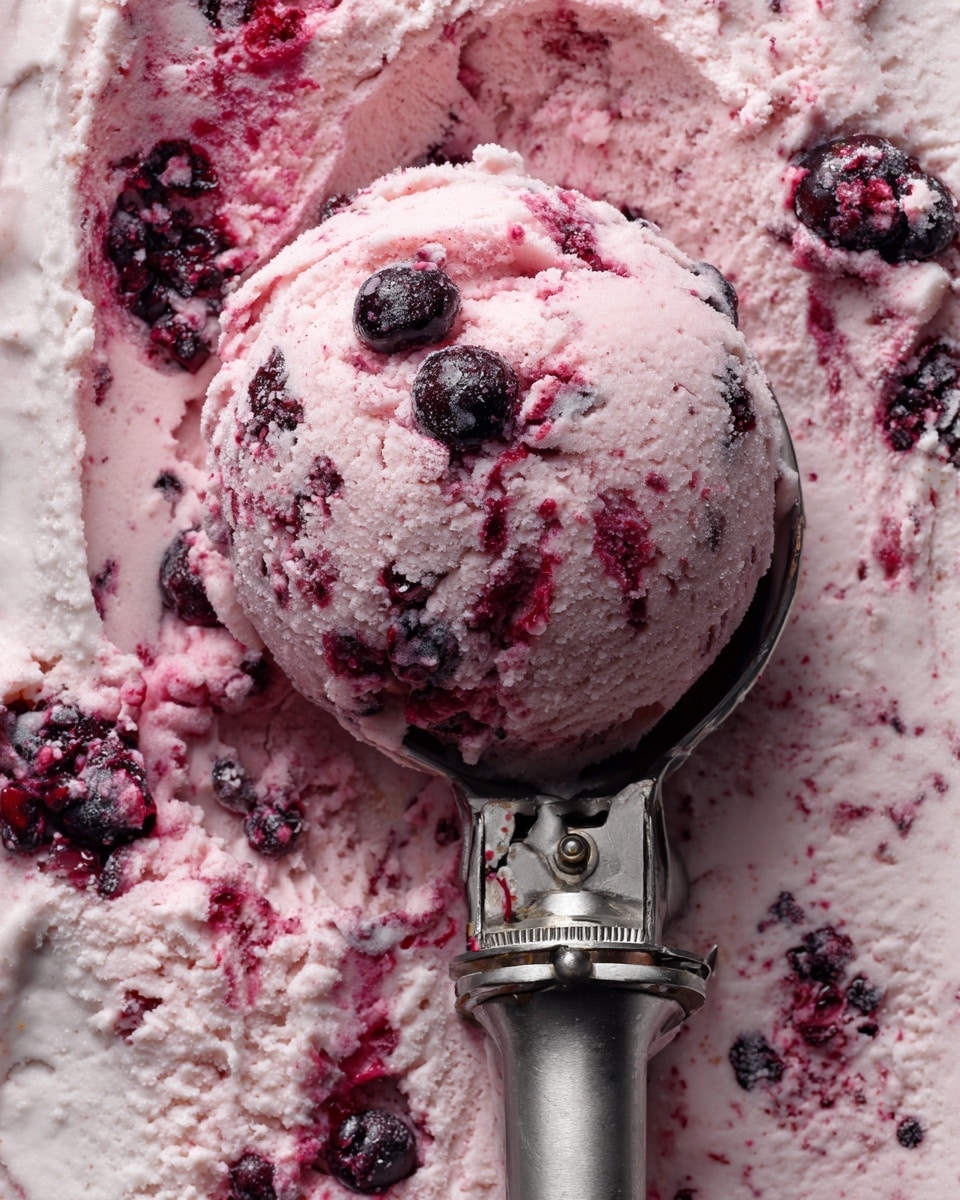
This no-churn mulberry ice cream is a deliciously creamy treat bursting with fresh berry flavor. With no ice cream maker needed, it’s an easy way to enjoy homemade ice cream perfect for warm days or any dessert craving.
Ingredients
- 2 ½ cups (½ pound) mulberries, fresh or frozen
- ½ cup granulated sugar
- 1 tablespoon fresh lemon juice
- 2 cups heavy cream
- 12 ounces sweetened condensed milk
- 1 teaspoon vanilla extract
Instructions
- Step 1: Line an 8-inch round cake pan with a large piece of parchment paper. Crumple the paper first to help it fit easily, then set the pan aside.
- Step 2: In a small saucepan, combine 2 cups of mulberries (reserving ½ cup), sugar, and lemon juice. Cook over medium heat, stirring occasionally, for 15 minutes until the berries break down and the juices reduce slightly.
- Step 3: Transfer the compote to a jar and blend with an immersion blender or regular blender until smooth. Set aside to cool, reserving ½ cup of the compote.
- Step 4: Whip the cold heavy cream in a large bowl to medium-stiff peaks using a whisk or mixer. Chill the whipped cream in the fridge while you prepare the ice cream base.
- Step 5: In another large bowl, whisk together the sweetened condensed milk, vanilla extract, and all of the blended compote except the ½ cup reserved earlier until well combined.
- Step 6: Gently fold the whipped cream into the ice cream base, mixing carefully to maintain a light, airy texture.
- Step 7: Pour half of the ice cream mixture into the prepared pan. Drizzle half of the reserved compote and scatter half of the reserved whole berries over it. Gently swirl to combine.
- Step 8: Add the remaining ice cream, then top with the rest of the compote and berries. Swirl again to create beautiful layers throughout.
- Step 9: Freeze the ice cream until solid, at least 4 hours or overnight.
- Step 10: Remove from the freezer 5 minutes before serving to soften slightly for easier scooping.
Tips & Variations
- Use frozen mulberries if fresh are unavailable; thaw before cooking the compote.
- For a smoother texture, strain the compote before blending to remove seeds.
- Try swirling in chopped fresh mint or a splash of liqueur for a unique flavor twist.
- To make individual servings, layer the mixture in small containers or cups before freezing.
Storage
Store the ice cream in an airtight container in the freezer for up to one week. To serve, let it sit at room temperature for 5 minutes to soften for easier scooping. Avoid refreezing any melted portions to maintain texture.
How to Serve
Serve this delicious recipe with your favorite sides.
FAQs
Can I use other berries instead of mulberries?
Yes, blackberries, raspberries, or blueberries can be used as substitutes. Adjust the cooking time if needed to soften the berries properly.
Do I need an ice cream maker for this recipe?
No. This recipe is designed to be no-churn, relying on whipped cream and sweetened condensed milk for a creamy texture without specialized equipment.
PrintNo-Churn Mulberry Ice Cream Recipe
This No-Churn Mulberry Ice Cream recipe offers a luscious, creamy homemade dessert made without an ice cream maker. It features a vibrant mulberry compote swirled through a whipped cream and sweetened condensed milk base, creating beautiful layers of fruity flavor and smooth texture. Perfect for berry lovers and easy to prepare, this frozen treat is ideal for warm weather indulgence or anytime you crave a refreshing, homemade ice cream.
- Prep Time: 20 minutes
- Cook Time: 15 minutes
- Total Time: 4 hours 35 minutes
- Yield: 8 servings 1x
- Category: Dessert
- Method: No-Cook
- Cuisine: American
- Diet: Vegetarian
Ingredients
For the Mulberry Compote
- 2 cups mulberries (fresh or frozen), plus ½ cup reserved berries
- ½ cup granulated sugar
- 1 tablespoon fresh lemon juice
For the Ice Cream Base
- 2 cups heavy cream, cold
- 12 ounces sweetened condensed milk
- 1 teaspoon vanilla extract
Instructions
- Prepare the Pan: Line an 8-inch round cake pan with a large piece of parchment paper, crumpling the paper beforehand to help it fit the pan easily. Set aside for later use.
- Cook the Mulberries: In a small saucepan, combine 2 cups of mulberries, granulated sugar, and lemon juice. Cook over medium heat, stirring occasionally, for about 15 minutes until berries break down and juices reduce slightly.
- Blend the Compote: Transfer the cooked mulberry mixture to a large jar and blend using an immersion blender until smooth. Alternatively, use a regular blender. Set aside to cool, reserving ½ cup of the compote separately.
- Whip the Cream: In a large mixing bowl, whip the cold heavy cream until medium-stiff peaks form using a whisk, hand mixer, or stand mixer. Refrigerate the whipped cream until needed.
- Mix Ice Cream Base: In another large bowl, whisk together the sweetened condensed milk, vanilla extract, and all of the blended mulberry compote except the reserved ½ cup and berries. Stir until well combined.
- Fold in Whipped Cream: Gently fold the whipped cream into the mulberry ice cream base, mixing carefully to maintain the airy texture.
- Layer the Ice Cream: Pour half of the ice cream mixture into the prepared cake pan. Drizzle half of the reserved mulberry compote and scatter half of the reserved whole berries on top. Use a spatula or knife to gently swirl the compote and berries into the ice cream.
- Add Remaining Layers: Top with the remaining ice cream, then the rest of the compote and whole berries. Swirl again gently to create beautiful layered effects throughout the ice cream.
- Freeze: Place the assembled ice cream in the freezer and let it freeze until solid, at least four hours or preferably overnight.
- Serve: Remove the ice cream from the freezer about 5 minutes before serving to soften slightly for easier scooping. Enjoy your homemade no-churn mulberry ice cream!
Notes
- Using fresh or frozen mulberries both work well; if frozen, thaw before cooking.
- Crumpling the parchment paper before lining the pan helps prevent tearing and makes removal easier.
- Gently folding the whipped cream preserves the airy texture essential for creamy no-churn ice cream.
- Allowing the ice cream to soften slightly before scooping improves texture and ease of serving.
- For extra flavor, a splash of liqueur such as Chambord can be added to the compote.
Keywords: No-Churn Ice Cream, Mulberry Ice Cream, Homemade Ice Cream, Berry Ice Cream, Easy Frozen Dessert, No Ice Cream Maker