Healthy Vegan Gluten-Free Peanut Butter Twix Bars Recipe
Introduction
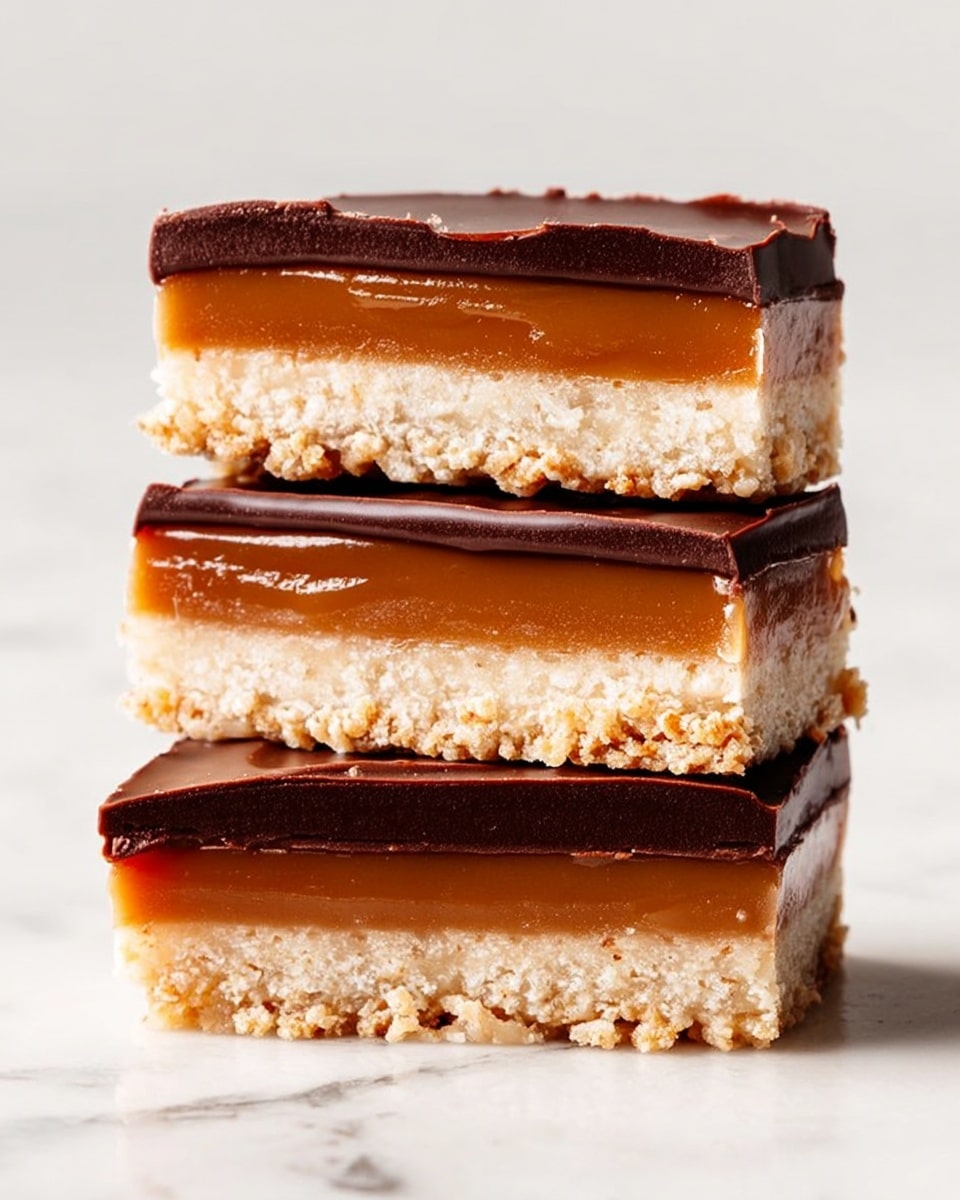
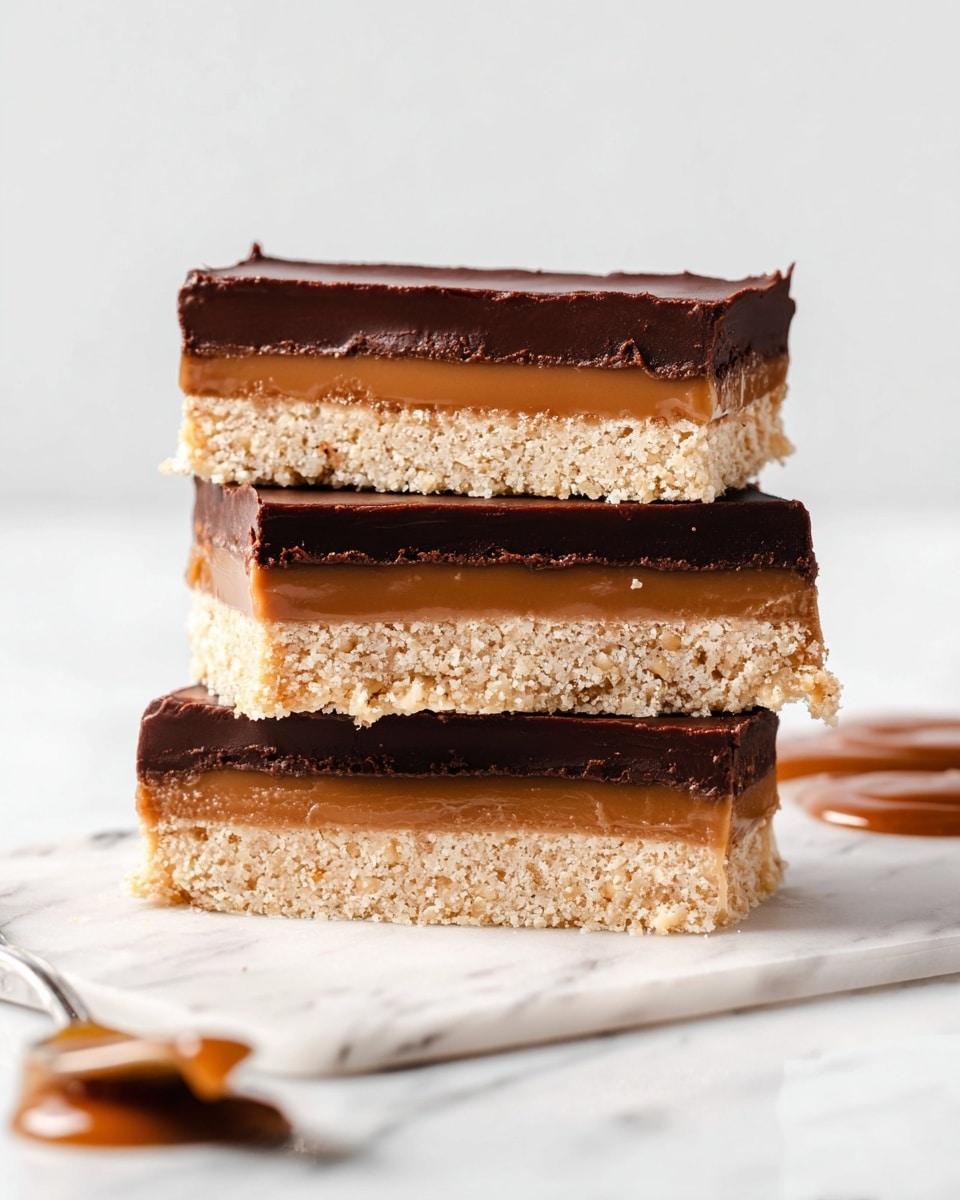
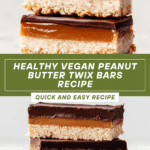
These Healthy Peanut Butter Twix Bars are a delicious vegan and gluten-free twist on the classic candy. Featuring a crunchy almond flour base, a rich peanut butter caramel layer, and a smooth chocolate topping, they satisfy your sweet tooth without any guilt.
Ingredients
- 1 ½ cups packed fine blanched almond flour
- 3 tablespoons melted and cooled coconut oil
- 2 tablespoons pure maple syrup
- 1 teaspoon vanilla extract
- ¼ teaspoon salt
- ⅔ cup drippy natural peanut butter (crunchy or creamy)
- 1/3 cup pure maple syrup
- 1/4 cup coconut oil
- 1 teaspoon vanilla extract
- 1/4 teaspoon sea salt
- 3/4 cup chocolate chips (dairy free if desired)
- 1 tablespoon coconut oil
Instructions
- Step 1: Preheat oven to 350 degrees F. Line an 8×8 inch square pan with parchment paper. Using an 8×8 inch pan is important as a 9×9 inch pan may be too big.
- Step 2: In a medium bowl, combine almond flour, coconut oil, maple syrup, vanilla extract, and salt. Mix with a fork until a thick crumbly texture forms. Press mixture evenly into the lined pan using your fingers. Bake for 10 minutes, then allow the crust to cool for 10 minutes before adding the next layer.
- Step 3: For the peanut butter caramel layer, combine peanut butter, maple syrup, coconut oil, vanilla extract, and sea salt in a medium pot. Heat over medium-low for about 2 minutes, stirring frequently until it starts to bubble slightly. Pour this caramel over the cooled crust.
- Step 4: Refrigerate for at least 30 minutes to 1 hour until the peanut butter layer hardens. To speed up, place in the freezer for 15-20 minutes if needed.
- Step 5: Prepare the chocolate layer by melting chocolate chips and coconut oil together. Use the microwave in 30-second increments, stirring between each, or melt gently in a small saucepan over low heat until smooth.
- Step 6: Pour the melted chocolate over the peanut butter layer and tilt the pan side-to-side to spread evenly. Refrigerate for at least 20 minutes until the chocolate hardens and the bars are cool.
- Step 7: Remove the bars from the pan and cut into 16 bars resembling Twix shapes. Cut the pan in half, then each half into 8 bars about 1 inch wide. Keep bars covered in the fridge until ready to serve. Enjoy!
Tips & Variations
- Use natural peanut butter with no added sugar or oil for the healthiest caramel layer.
- Swap almond flour for another nut flour like cashew or hazelnut for a different flavor.
- To make the bars nut-free, try sunflower seed butter instead of peanut butter and use a seed-based flour.
- If you want a richer chocolate layer, add a pinch of sea salt or a few drops of vanilla extract while melting.
Storage
Store these bars covered in the refrigerator for up to one week. For longer storage, wrap bars individually and freeze for up to one month. Thaw in the fridge before serving. To soften slightly before eating, let bars sit at room temperature for 10 minutes.
How to Serve
Serve this delicious recipe with your favorite sides.
FAQs
Can I use crunchy peanut butter instead of smooth?
Yes, either crunchy or creamy peanut butter works well in this recipe. Crunchy peanut butter will add a little more texture to the caramel layer.
Why do I need to use an 8×8 inch pan specifically?
The 8×8 inch size is important to achieve the right thickness of each layer. A larger pan like 9×9 inches will make the bars thinner and could affect the set and texture.
PrintHealthy Vegan Gluten-Free Peanut Butter Twix Bars Recipe

These Healthy Peanut Butter Twix Bars are a delicious vegan and gluten-free treat featuring a nutty almond flour shortbread base, a rich peanut butter caramel layer, and a smooth dairy-free chocolate topping. Perfect for a guilt-free indulgence, these bars combine wholesome ingredients with a classic candy bar inspiration, making them ideal for snack time or dessert.
- Prep Time: 15 minutes
- Cook Time: 10 minutes
- Total Time: 1 hour 45 minutes
- Yield: 16 bars 1x
- Category: Dessert
- Method: Baking
- Cuisine: American
- Diet: Vegan,Gluten Free
Ingredients
Shortbread Base
- 1 ½ cups packed fine blanched almond flour (I use Bob’s Red Mill)
- 3 tablespoons melted and cooled coconut oil
- 2 tablespoons pure maple syrup
- 1 teaspoon vanilla extract
- ¼ teaspoon salt
Peanut Butter Layer
- ⅔ cup drippy natural peanut butter (crunchy or creamy works)
- 1/3 cup pure maple syrup
- 1/4 cup coconut oil
- 1 teaspoon vanilla extract
- 1/4 teaspoon sea salt
Chocolate Layer
- 3/4 cup chocolate chips, dairy free if desired
- 1 tablespoon coconut oil
Instructions
- Preheat and Prepare Pan: Preheat your oven to 350°F (177°C). Line an 8×8 inch square pan with parchment paper to ensure the bars don’t stick; using a 9×9 inch pan may result in thinner bars than desired.
- Make Shortbread Base: In a medium bowl, mix the almond flour, melted and cooled coconut oil, maple syrup, vanilla extract, and salt with a fork until the mixture forms a thick crumbly texture. Press this mixture evenly into the prepared pan using your fingers. Bake for 10 minutes, then allow the crust to cool for 10 minutes before adding the peanut butter caramel layer.
- Prepare Peanut Butter Caramel Layer: Combine peanut butter, maple syrup, coconut oil, vanilla extract, and sea salt in a medium pot. Heat over medium-low heat for about 2 minutes, stirring frequently, until the caramel begins to bubble slightly. Pour the warm mixture evenly over the cooled shortbread layer.
- Harden Peanut Butter Layer: Place the pan in the refrigerator for 30 minutes to 1 hour to let the peanut butter layer set completely. To speed up the process, you can freeze the bars for 15-20 minutes.
- Melt Chocolate Layer: Place chocolate chips and coconut oil in a microwave-safe bowl. Microwave in 30-second increments, stirring between each, until fully melted and smooth. Alternatively, melt in a small saucepan over low heat if preferred.
- Add Chocolate Layer and Chill: Pour the melted chocolate over the set peanut butter layer. Tilt the pan gently side to side to evenly distribute the chocolate. Refrigerate for at least 20 minutes until the chocolate has hardened and the bars are fully cooled.
- Cut and Serve: Remove the bars from the pan using the parchment paper. Cut the entire pan in half, then each half into 8 bars measuring approximately 1 inch wide, to yield 16 Twix-style bars in total. Keep the bars covered in the fridge until ready to serve for best freshness.
Notes
- Use an 8×8 inch pan for the correct thickness; 9×9 inch pans will make thinner bars.
- Natural peanut butter (with oil separation) is preferred for best texture in the caramel layer.
- The bars should be stored in the refrigerator and kept covered for optimal freshness.
- Freezing for 15-20 minutes can speed up the setting time if needed.
- Dairy-free chocolate chips make this recipe fully vegan.
Keywords: Healthy peanut butter twix bars, vegan twix bars, gluten free dessert, almond flour shortbread, peanut butter caramel, dairy free chocolate dessert
