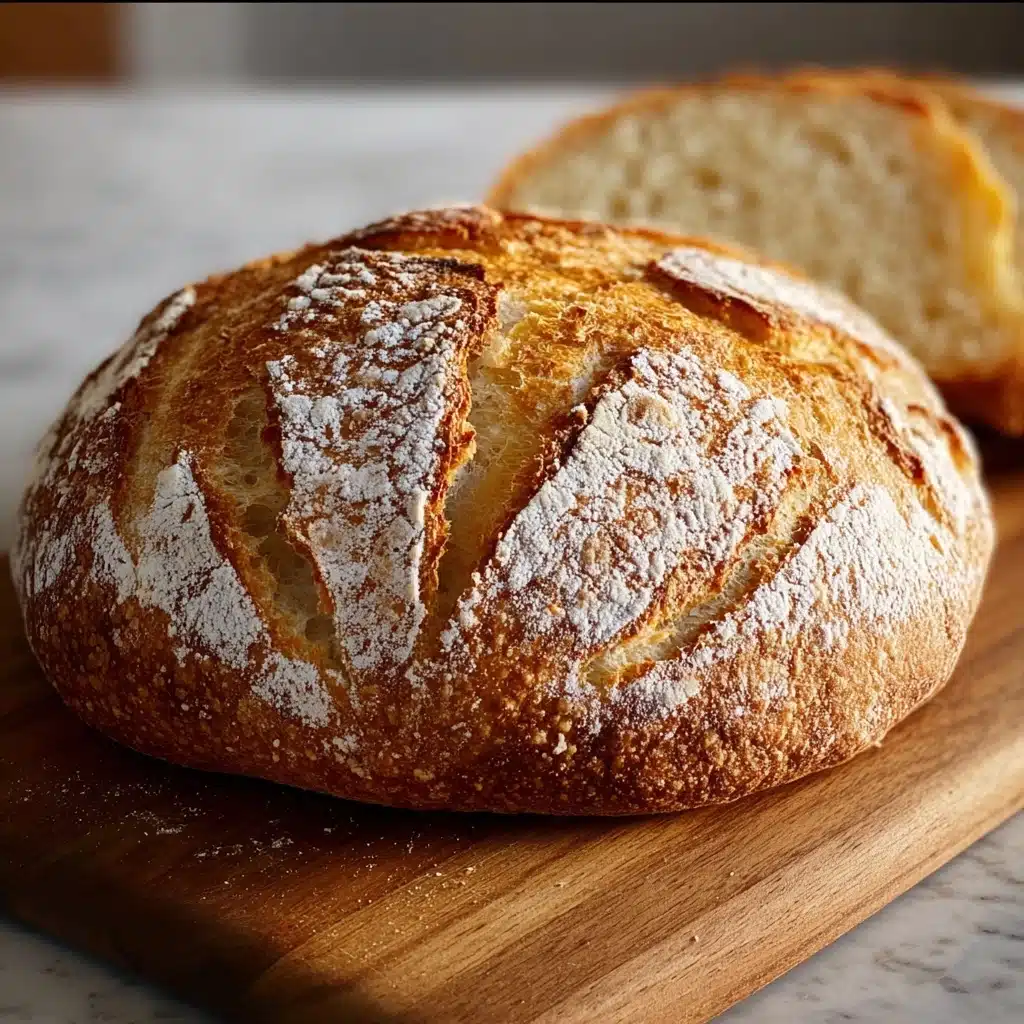
Crusty Golden Sourdough Bread with a Soft Chewy Center Recipe
If you have ever dreamed of baking at home, nothing beats the warm satisfaction of pulling a freshly baked loaf from the oven with a crackling crust and the softest, chewiest inside imaginable. This recipe for Crusty Golden Sourdough Bread with a Soft Chewy Center will guide you through every step to create a loaf that boasts a perfectly golden brown exterior combined with a tender crumb that’s full of flavor. It’s an experience that feels artisanal yet approachable, even if you are trying your hand at sourdough for the first time.
Ingredients You’ll Need
For this recipe, the magic lies in a few simple, high-quality ingredients that work together to create exceptional texture and flavor. Each component is essential, whether it’s the flour’s ability to build structure, the water’s role in activating the starter, or the salt’s perfect seasoning.
- 4 cups (500g) bread flour or all-purpose flour: Choosing bread flour gives the dough strength to develop a chewy texture, but all-purpose flour works beautifully too.
- 1⅔ cups (375g) warm water: Warm water helps activate the sourdough starter and ensures the dough forms correctly.
- 1 cup (200g) active sourdough starter: This is the heart of your bread, providing the natural fermentation that creates those delightful tangy notes.
- 2 teaspoons (10g) salt: Salt not only seasons but also regulates yeast activity and improves the dough’s strength.
How to Make Crusty Golden Sourdough Bread with a Soft Chewy Center
Step 1: Mixing the Flour and Water
Begin by combining your flour and warm water in a large bowl. Stir the mixture until it forms a shaggy dough—don’t worry about smoothness here. Then, let the dough rest for 30 minutes, a process known as autolyse that kickstarts gluten development and hydrates the flour.
Step 2: Incorporate the Starter and Salt
Add your active sourdough starter and salt to the rested dough. Mix thoroughly until everything is well combined. This is where your loaf begins to come alive, as the starter introduces the wild yeasts and bacteria essential for that distinct sourdough flavor and rise.
Step 3: The Stretch and Fold Technique
Cover the bowl loosely with a towel or plastic wrap, then set a timer. Every 30 minutes over the course of 2 hours, perform a set of stretch and folds. Pull one side of the dough up and fold it over the middle, then rotate the bowl and repeat three more times. This technique strengthens the dough’s gluten without aggressive kneading, helping develop that coveted chewy center.
Step 4: Bulk Fermentation
After the last stretch and fold, let your dough rise undisturbed for 6 to 8 hours at room temperature. It should double in size, look bubbly, and feel pleasantly puffy—signs that fermentation is in full swing. This slow fermentation deepens the complex flavors in your Crusty Golden Sourdough Bread with a Soft Chewy Center.
Step 5: Shaping and Cold Proofing
Turn your dough gently onto a floured surface and shape it into a round or oval loaf. Folding and tucking the edges beneath creates tension for a beautiful rise. Place your shaped dough seam-side up into a floured proofing basket or a towel-lined bowl. Cover and refrigerate it overnight for 8 to 12 hours; this cold proofing enhances flavor and strengthens the dough.
Step 6: Baking Your Crusty Golden Sourdough Bread with a Soft Chewy Center
Preheat your oven to 450°F (232°C) with a Dutch oven inside. Remove your dough from the fridge and carefully turn it onto parchment paper. Score the dough’s surface with a sharp knife—this controls how the bread expands and gives it that signature rustic look. Then, gently transfer the dough with the parchment into your hot Dutch oven. Cover and bake for 20 minutes, then uncover and bake for another 25 minutes until the crust is a deep golden brown and irresistibly crisp.
Step 7: Cooling
Once baked, lift your loaf from the Dutch oven and cool it completely on a wire rack. This allows the crumb to set properly and avoids a gummy texture inside. When cooled, you’ll find your loaf is a perfect balance: the sought-after Crusty Golden Sourdough Bread with a Soft Chewy Center.
How to Serve Crusty Golden Sourdough Bread with a Soft Chewy Center

Garnishes
While the bread is exceptional on its own, a light spread of high-quality butter or some creamy goat cheese can elevate the experience. A sprinkle of sea salt flakes or a drizzle of extra virgin olive oil adds even more depth to each bite.
Side Dishes
This sourdough pairs wonderfully with hearty soups, vibrant salads, or rich stews. Its sturdy crust makes it ideal for dunking, soaking up flavors while maintaining its integrity. Try it alongside tomato basil soup or a roasted vegetable medley for an unforgettable meal.
Creative Ways to Present
Transform this bread into an artisanal bruschetta with ripe tomatoes, fresh basil, and a brush of garlic oil. Or slice thickly to make savory sandwiches bursting with fresh ingredients. The versatility of your Crusty Golden Sourdough Bread with a Soft Chewy Center ensures it shines in many culinary creations.
Make Ahead and Storage
Storing Leftovers
To keep your loaf fresh, store it at room temperature wrapped loosely in a kitchen towel or paper bag. This helps the crust remain crisp while preventing the bread from drying out. Avoid plastic bags as they can soften the crust prematurely.
Freezing
If you want to save some loaf for later, slice the bread and freeze it in an airtight bag. This allows you to enjoy your Crusty Golden Sourdough Bread with a Soft Chewy Center days or even weeks after baking. Just pop a slice or two in the toaster or oven when ready.
Reheating
For the best eating experience after storage, reheat the bread in a preheated oven at 350°F (175°C) for 8 to 10 minutes. This revives the crust’s crunch and warms the chewy interior, almost like it just came out of the oven.
FAQs
What if my sourdough starter is not very active?
If your starter isn’t bubbling and rising well, it may need more feedings or a warmer environment. A lively starter is crucial for the sourdough’s rise and flavor, so take time to build it up before baking.
Can I use whole wheat flour instead of bread flour?
You can substitute some or all the bread flour with whole wheat, but keep in mind this will alter the texture and density. Whole wheat absorbs more water and results in a denser crumb, so adjust hydration accordingly.
Why does the bread need to rest overnight in the fridge?
The cold proof slows fermentation, allowing flavors to deepen and the gluten to strengthen. This step also helps improve the crust’s crispness when baked.
Is it necessary to use a Dutch oven for baking?
Using a Dutch oven traps steam, which is essential for creating a crisp crust and ensuring good oven spring. If you don’t have one, a heavy covered pot or a baking stone with steam trays can be alternatives.
How do I know when the bread is fully baked?
The crust should be a deep golden color and sound hollow when tapped on the bottom. An internal temperature of around 205°F (96°C) indicates the loaf is done and ready to cool.
Final Thoughts
Baking your own Crusty Golden Sourdough Bread with a Soft Chewy Center is truly a rewarding adventure. From mixing simple ingredients to enjoying that first heavenly bite, each step builds your skills and appreciation for handmade bread. I encourage you to give this recipe a try and savor the wonderful smells, textures, and flavors that come with homemade sourdough. It’s more than just bread—it’s a delicious connection to tradition and comfort.
PrintCrusty Golden Sourdough Bread with a Soft Chewy Center Recipe

This Crusty Golden Sourdough Bread recipe yields a beautifully rustic loaf with a crunchy, golden crust and a soft, chewy interior. Made with simple ingredients and a traditional sourdough starter, it requires minimal hands-on time but delivers maximum flavor and texture through slow fermentation and careful baking in a Dutch oven.
- Prep Time: 45 minutes
- Cook Time: 45 minutes
- Total Time: 12 to 14 hours (including fermentation and proofing)
- Yield: 1 large loaf (approximately 800-900g) 1x
- Category: Bread
- Method: Baking
- Cuisine: Artisan
- Diet: Vegetarian
Ingredients
Dry Ingredients
- 4 cups (500g) bread flour or all-purpose flour
- 2 teaspoons (10g) salt
Wet Ingredients
- 1⅔ cups (375g) warm water
- 1 cup (200g) active sourdough starter
Instructions
- Mix Flour and Water: In a large mixing bowl, combine 4 cups of flour and 1⅔ cups of warm water. Stir until a shaggy dough forms, then let it rest for 30 minutes to allow the flour to fully hydrate.
- Add Starter and Salt: After resting, add 1 cup of active sourdough starter and 2 teaspoons of salt to the dough. Mix thoroughly until all ingredients are fully incorporated.
- Bulk Fermentation and Stretch & Folds: Cover the bowl with a clean towel or plastic wrap and let the dough sit at room temperature. Every 30 minutes for 2 hours, perform a set of stretch and folds by pulling one side of the dough upward and folding it over itself, turning the bowl a quarter turn and repeating three more times. This helps develop gluten strength.
- Long Rise: After the final fold, cover the dough again and allow it to rise at room temperature for 6 to 8 hours until it doubles in size and becomes bubbly and puffy.
- Shape the Dough: Gently transfer the dough to a lightly floured surface. Shape it into a round or oval loaf by folding and tucking the edges underneath to create surface tension.
- Proofing: Place the shaped dough seam-side up into a floured proofing basket or a towel-lined bowl. Cover and refrigerate for 8 to 12 hours to develop flavor and improve texture.
- Preheat Oven and Dutch Oven: The next day, place a Dutch oven in your oven and preheat to 450°F (232°C) for at least 30 minutes to ensure it’s thoroughly hot.
- Prepare for Baking: Remove the dough from the fridge and turn it out onto parchment paper. Score the top of the dough with a sharp knife or razor blade to allow controlled expansion during baking.
- Bake Covered: Carefully lower the dough along with the parchment paper into the hot Dutch oven. Cover and bake for 20 minutes to create steam for a crusty exterior.
- Bake Uncovered: Remove the lid and bake uncovered for an additional 25 minutes, until the crust is a deep golden brown and crisp.
- Cool: Remove the bread from the Dutch oven and transfer it to a wire rack. Let it cool completely before slicing to finish the cooking process and set the crumb.
Notes
- Use a kitchen scale for best accuracy with ingredient measurements.
- The sourdough starter should be active and bubbly for optimal rise.
- If you don’t have a proofing basket, a bowl lined with a well-floured kitchen towel works well.
- Allowing the dough to rest overnight in the fridge improves flavor and texture.
- Use a sharp blade to score the dough to prevent tearing during baking.
- Letting the bread cool completely before slicing ensures the crumb is set and not gummy.
- Keep your Dutch oven covered initially to trap steam, which creates a crispy crust.
- You can store leftover bread in a paper bag to maintain crust crispness the next day.
Nutrition
- Serving Size: 1 slice (about 80g)
- Calories: 210
- Sugar: 0.2g
- Sodium: 330mg
- Fat: 1g
- Saturated Fat: 0.2g
- Unsaturated Fat: 0.6g
- Trans Fat: 0g
- Carbohydrates: 44g
- Fiber: 2g
- Protein: 7g
- Cholesterol: 0mg
Keywords: sourdough bread, crusty bread, artisan bread, homemade bread, easy sourdough recipe, chewy bread, Dutch oven bread


