Classic Scones Recipe
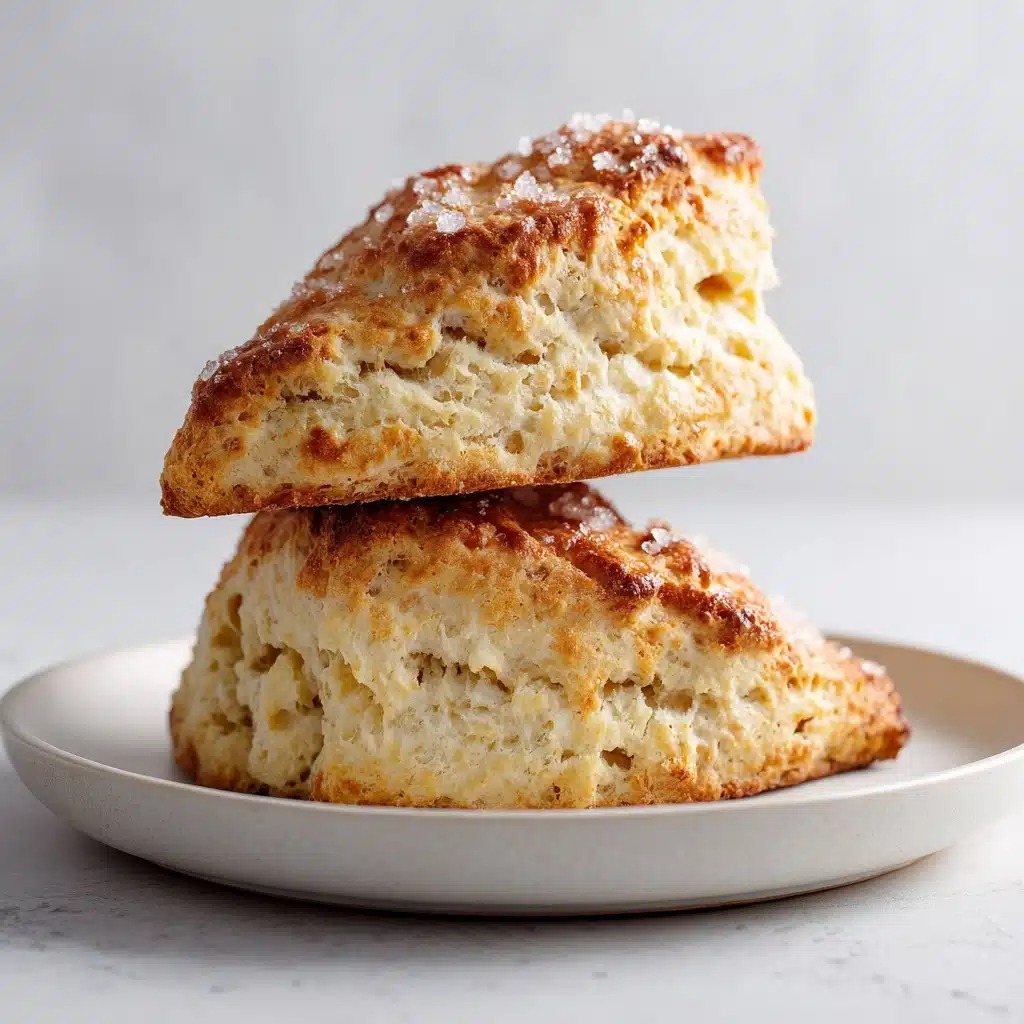
If you’re after a treat that embodies warmth, comfort, and a touch of British charm, look no further than Classic Scones. These tender, golden triangles are everything a scone should be—flaky, buttery, and just sweet enough to be enjoyed plain or with your favorite jam. Whether you’re sipping tea with friends or indulging in a cozy breakfast at home, Classic Scones bring a sense of occasion to any table. Let me lead you through the magic of making them from scratch—you won’t believe how easy it is to turn your kitchen into a bakery.
Ingredients You’ll Need
With just a handful of simple, everyday ingredients, Classic Scones come together beautifully. Each element plays a crucial role in creating the perfect balance of flavor, crumb, and color, ensuring that every scone emerges from the oven just right.
- All-purpose flour: The trusty base for structure and a tender crumb—measure carefully for best results!
- Granulated sugar: Just enough sweetness to let these scones shine without being overly sugary.
- Fine sea salt: A pinch brings all the flavors into balance, enhancing both sweet and buttery notes.
- Baking powder: This is what gives scones their signature rise and lightness—don’t skip it.
- Baking soda: Works with the buttermilk to achieve extra lift and a soft texture.
- Unsalted butter (cold and cubed): The secret to dreamy flakes—keep it cold for the best texture.
- Buttermilk: Adds tang and moisture, helping the crumb stay tender and flavorful.
- Large eggs: These bind the dough and give the scones a lovely golden hue.
- Vanilla extract: Just a splash perfumes the dough with a delicate, inviting aroma.
- Coarse sugar (for topping): The finishing touch for amazing crunch and sparkle.
How to Make Classic Scones
Step 1: Get Prepared
Start by adjusting your oven rack to the center and preheating your oven to 400°F. Line two baking pans with parchment paper; this helps prevent sticking and ensures your Classic Scones bake up perfectly golden without burning on the bottom.
Step 2: Mix Dry Ingredients
In a large bowl, stir together the flour, sugar, salt, baking powder, and baking soda. Whisking these together evenly distributes all the leavening and seasoning, making sure every bite is as good as the last.
Step 3: Cut in Butter
Add your cold, cubed butter to the dry ingredients. Using a pastry cutter or a fork, cut the butter into the mixture until it resembles large peas. It might look a bit shaggy or uneven, but those visible butter chunks are exactly what make Classic Scones so irresistibly flaky and tender.
Step 4: Combine Wet Ingredients
In a separate bowl, whisk together buttermilk, one egg, and vanilla extract. This mix adds richness and moisture, ready to bring the scone dough to life.
Step 5: Bring It All Together
Make a well in the center of your dry mixture and pour in the wet ingredients. Gently fold until it just comes together—don’t overmix! If you want to add dried fruit or chocolate chips, now’s the moment to toss in your extras.
Step 6: Shape the Dough
Turn the dough out onto a lightly floured surface. Carefully bring it together and pat it into a mass. (If you’re feeling fancy, you can laminate the dough here for extra layers—simply fold and flatten a few times before the next step.)
Step 7: Divide and Cut
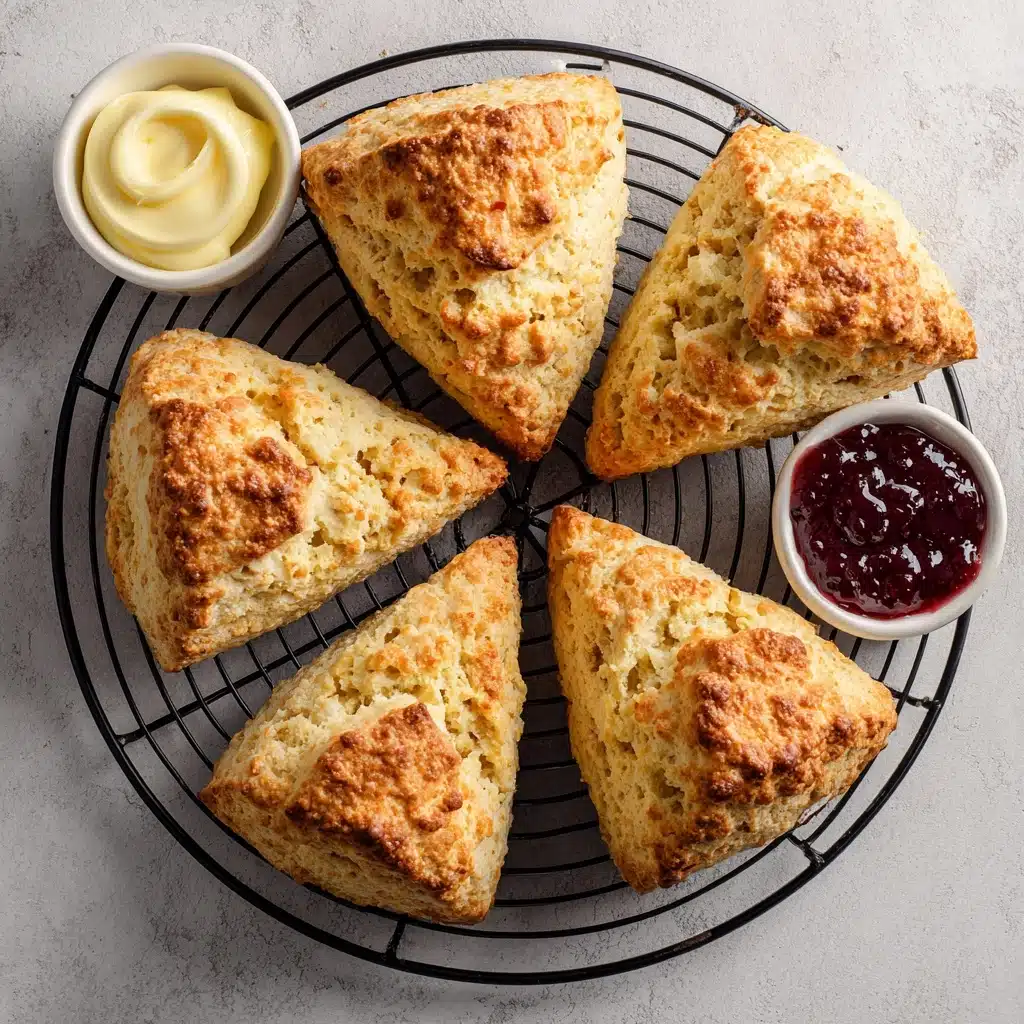
Split the dough into two equal pieces. Pat each into a 3/4-inch thick, 6-inch wide round. Grab a sharp knife or bench scraper and cut each round into eight wedges. Move the wedges to your prepared pans, spacing them about two inches apart so they bake evenly.
Step 8: Make Ahead (Optional)
If time’s tight, you can cover the unbaked scones and refrigerate overnight or pop them in the freezer for later—up to one month. Straight from the freezer, just bake as usual but add a couple minutes to the timer.
Step 9: Egg Wash & Sugar Topping
Whisk the remaining egg with a teaspoon of water. Gently brush this over the tops of the scones, then sprinkle generously with coarse sugar. This step gives Classic Scones their beautiful color and irresistible crunch.
Step 10: Bake to Perfection
Bake for 12 to 15 minutes until the scones are lightly golden and baked through. They’re at their best warm, so don’t be shy—grab one as soon as they’re cool enough to handle!
How to Serve Classic Scones
Garnishes
The magic of Classic Scones is how beautifully they pair with simple garnishes. A smear of clotted cream, a dollop of fresh whipped cream, or a spoonful of tart berry jam are all you need to highlight their delicate flavor. If you’re feeling adventurous, try a drizzle of honey or a dusting of powdered sugar just before serving.
Side Dishes
Scones shine alongside a freshly brewed pot of tea or a strong cup of coffee. For a breakfast spread, serve with sliced fresh fruit, a bowl of Greek yogurt, or even a few savory options like soft-boiled eggs and smoked salmon for a sophisticated brunch vibe.
Creative Ways to Present
You don’t need to be at a fancy hotel to enjoy a scone tower! Stack your Classic Scones on a tiered tray for a dramatic centerpiece, or gift-wrap a few wedges in parchment for a homemade treat. Arrange slices on a rustic board surrounded by fruits, flowers, and jams for an inviting, picnic-ready look.
Make Ahead and Storage
Storing Leftovers
If you somehow have leftovers (they do tend to vanish quickly), store your Classic Scones in an airtight container at room temperature for up to two days. For slightly longer freshness, store them in the fridge, but reheat to bring back that just-baked texture.
Freezing
Classic Scones freeze beautifully. Once they’re completely cooled, tuck them in a freezer-safe bag or container for up to three months. You can also freeze raw, shaped scones and bake them straight from the freezer for freshly baked treats any time.
Reheating
For the best results, warm your Classic Scones in a 300°F oven for 5 to 10 minutes. This revives their crisp edges and fluffy interior—just like freshly baked! If you’re in a rush, a quick zap in the microwave for 20 seconds also works in a pinch.
FAQs
Why does the butter need to be cold?
Cold butter is essential for achieving the flaky, tender texture that sets Classic Scones apart. As the scones bake, the cold butter melts and creates steam, adding delightful layers and lightness.
Can I make Classic Scones dairy free?
Absolutely! Swap in a good plant-based butter and use a non-dairy milk with a tablespoon of vinegar or lemon juice for buttermilk. The results are surprisingly fabulous and just as flavorful.
Is it okay to add mix-ins like fruit or chocolate?
Yes, Classic Scones are wonderfully versatile. Add up to a cup of dried fruit, chocolate chips, or chopped nuts with the dry ingredients for delicious customizations that don’t mess with the base recipe.
What if I don’t have buttermilk?
If you’re out of buttermilk, simply mix 1 tablespoon of lemon juice or white vinegar with 1 cup of milk and let it sit for 5 minutes. This homemade substitute works beautifully in Classic Scones.
How do I know when the scones are done baking?
The tops will be lightly golden, and the scones will feel slightly firm to the touch. To double-check, you can insert a toothpick into the center of a scone—it should come out clean or with just a few crumbs attached.
Final Thoughts
Nothing beats the fresh-from-the-oven aroma and satisfying bite of homemade Classic Scones. Whether you’re baking for a special occasion or simply treating yourself, don’t hesitate to give this cherished recipe a whirl. Trust me, your future self will thank you!
PrintClassic Scones Recipe
Classic Scones are a delightful treat for breakfast or afternoon tea. These scones are tender, buttery, and perfect when served warm with a dollop of jam and cream.
- Prep Time: 15 minutes
- Cook Time: 15 minutes
- Total Time: 30 minutes
- Yield: 16 scones 1x
- Category: Breakfast, Brunch
- Method: Baking
- Cuisine: British
- Diet: Vegetarian
Ingredients
Dry Ingredients:
- 3 cups (381 grams) all-purpose flour, (measured correctly)
- 1/3 cup (66 grams) granulated sugar
- 1 teaspoon fine sea salt
- 1 tablespoon baking powder
- 1/2 teaspoon baking soda
Wet Ingredients:
- 1 1/2 sticks (170 grams) unsalted butter, (cold and cubed)
- 1 cup (237 grams) buttermilk
- 2 large eggs, (divided)
- 1 teaspoon vanilla extract
Coarse sugar, (for topping)
Instructions
- Preheat and Prepare: Adjust the oven rack to the center position and preheat to 400°F. Line two baking pans with parchment paper.
- Mix Dry Ingredients: In a large bowl, combine the flour, sugar, salt, baking powder, and baking soda.
- Cut in Butter: Add the butter and cut with a pastry cutter or a fork until the butter is the size of large peas.
- Combine Wet Ingredients: In a separate bowl, whisk together the buttermilk, 1 egg, and vanilla extract.
- Combine and Mix: Make a well in the middle of the dry ingredients and add the liquid mixture. Mix until just combined. Do not overmix. Add any additional flavorings if desired.
- Shape and Cut: Transfer the dough to a floured surface. Divide into 2 parts, shape into rounds, and cut into wedges. Place on baking pans.
- Prepare for Baking: Optionally, refrigerate or freeze unbaked scones. Brush scones with egg wash, sprinkle with sugar.
- Bake: Bake for 12 to 15 minutes or until lightly browned. Serve warm.
Notes
- For a flakier texture, consider laminating the dough by folding and rolling it several times.
- Customize your scones by adding dried fruit, nuts, chocolate, or other mix-ins to the dough.
- Store any leftovers in an airtight container for up to 2 days. Reheat before serving.
Nutrition
- Serving Size: 1 scone
- Calories: 230 kcal
- Sugar: 8g
- Sodium: 320mg
- Fat: 10g
- Saturated Fat: 6g
- Unsaturated Fat: 4g
- Trans Fat: 0g
- Carbohydrates: 30g
- Fiber: 1g
- Protein: 4g
- Cholesterol: 55mg
Keywords: Classic Scones, Scones Recipe, Breakfast Scones


