Cheesy Texas Trash Dip (Easy Mexican Bean Dip) Recipe
Introduction
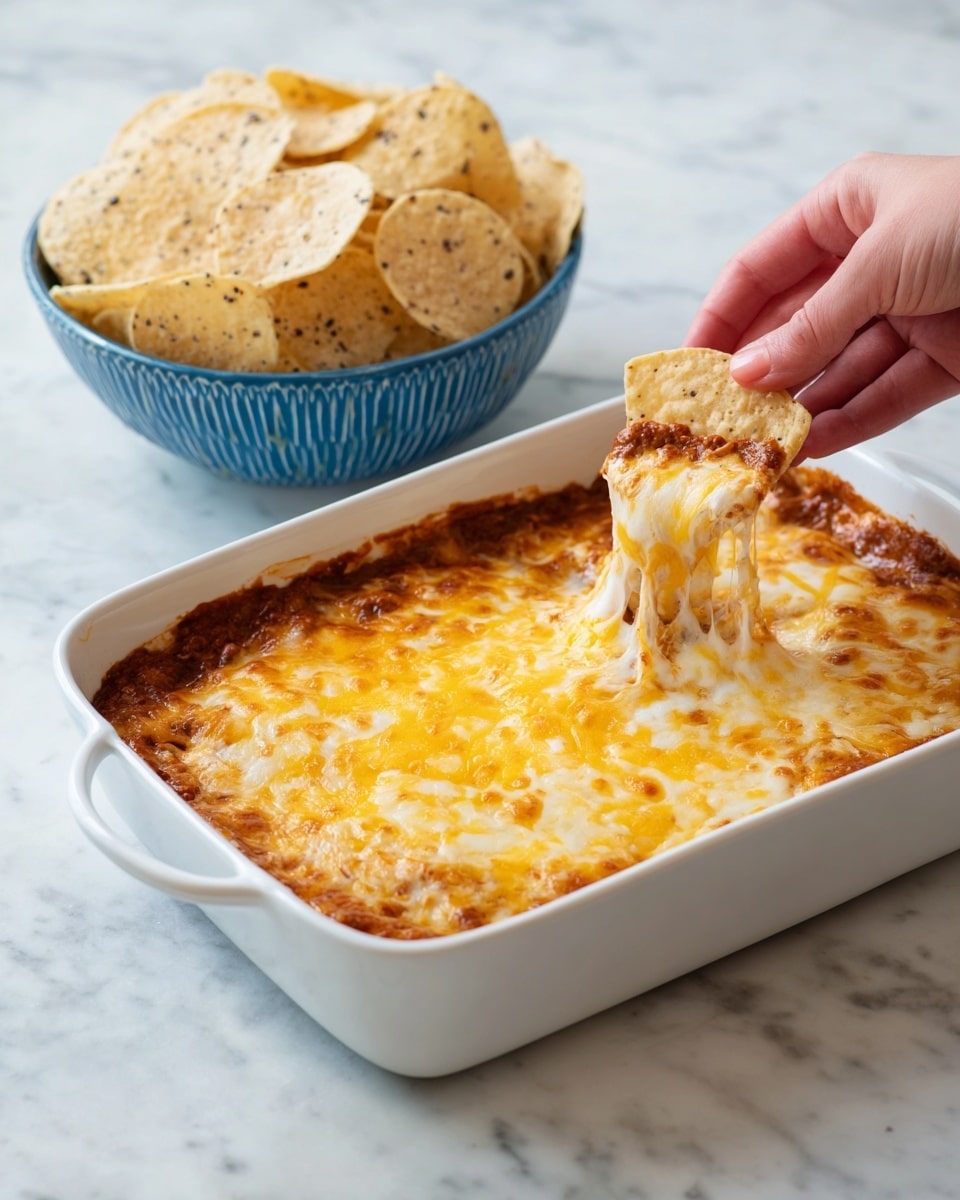
Cheesy Texas Trash Dip is a rich and flavorful Mexican-inspired dip that’s perfect for parties or casual gatherings. Loaded with beans, creamy cheese, and a hint of spice, it’s sure to be a crowd-pleaser served warm with sturdy tortilla chips.
Ingredients
- 2 16-oz cans refried beans
- 8 ounces cream cheese (full fat or low fat)
- 8 ounces sour cream (full fat or low fat)
- 1 ounce package McCormick Taco Seasoning Mix
- 2 cups shredded Pepper Jack cheese
- 2 cups shredded sharp Cheddar cheese
- 1 4-ounce can chopped roasted green chiles (optional)
Instructions
- Step 1: Preheat the oven to 350˚F.
- Step 2: Cut the cream cheese into large chunks and place in a microwave-safe bowl. Add the sour cream and microwave on HIGH for 1 minute. Stir to combine until smooth.
- Step 3: Add the refried beans and taco seasoning to the cream cheese mixture. Mix well, using a hand mixer if needed, until smooth. Stir in the chopped green chiles if using, along with one-third of the shredded cheeses.
- Step 4: Spread the bean mixture evenly in a 9 x 13 inch baking dish. Sprinkle the remaining cheese evenly over the top.
- Step 5: Bake for about 30 minutes, or until the cheese is melted and golden, and the beans are bubbling around the edges. At higher altitudes, this may take a few extra minutes.
- Step 6: Serve the dip warm with sturdy tortilla chips for easy dipping.
Tips & Variations
- For extra heat, add diced jalapeños or a splash of hot sauce to the bean mixture.
- Use a mix of your favorite cheeses for a different flavor profile, such as Monterey Jack or mozzarella.
- If you prefer a smoother dip, blend the refried beans before mixing.
- To make it vegetarian-friendly, ensure the refried beans do not contain lard.
Storage
Store any leftovers in an airtight container in the refrigerator for up to 3 days. Reheat gently in the microwave or oven until warmed through. Add a sprinkle of cheese on top before reheating if desired.
How to Serve

Serve this delicious recipe with your favorite sides.
FAQs
Can I make this dip ahead of time?
Yes, you can prepare the dip mixture a day in advance and refrigerate it before baking. Just bake it fresh when you’re ready to serve.
What can I serve with Texas Trash Dip besides tortilla chips?
This dip pairs well with fresh vegetable sticks like bell peppers and celery, pita bread, or even as a topping for baked potatoes or nachos.
PrintCheesy Texas Trash Dip (Easy Mexican Bean Dip) Recipe

Cheesy Texas Trash Dip is a hearty and flavorful Mexican bean dip made with refried beans, cream cheese, sour cream, seasoned with taco mix, and loaded with melted cheddar and pepper jack cheeses. It’s baked until bubbly and golden, perfect for parties or game day served warm with tortilla chips.
- Prep Time: 10 minutes
- Cook Time: 30 minutes
- Total Time: 40 minutes
- Yield: 12 servings 1x
- Category: Appetizer
- Method: Baking
- Cuisine: Mexican
Ingredients
Beans and Dairy
- 2 16-oz cans refried beans
- 8 ounces cream cheese (full fat or low fat)
- 8 ounces sour cream (full fat or low fat)
Seasoning and Cheese
- 1 ounce package McCormick Taco Seasoning Mix
- 2 cups shredded Pepper Jack cheese
- 2 cups shredded sharp Cheddar cheese
- 1 4-ounce can chopped roasted green chiles (optional)
Instructions
- Preheat Oven: Preheat your oven to 350˚F to prepare for baking the dip.
- Soften Dairy: Cut the cream cheese into large chunks, place in a microwave-safe bowl, add sour cream, and microwave on HIGH for 1 minute. Stir well to combine until smooth.
- Mix Ingredients: Add the refried beans and taco seasoning mix to the cream cheese mixture. Use a hand mixer if needed to achieve a smooth consistency. Stir in the chopped roasted green chiles if using, and add one-third of the shredded cheeses to the mixture.
- Layer the Dip: Spread the bean and cheese mixture evenly in a 9×13 inch baking dish. Sprinkle the remaining shredded cheeses evenly over the top of the bean mixture.
- Bake: Bake in the preheated oven for about 30 minutes or until the cheese is melted, bubbling, and golden, and the refried beans are hot around the edges. At higher altitudes, it may take up to 35 minutes.
- Serve Warm: Remove from oven and serve the dip warm with sturdy tortilla chips for dipping.
Notes
- Using full fat or low fat cream cheese and sour cream works well depending on preference.
- Microwaving the cream cheese mixture helps to easily combine ingredients without lumps.
- Feel free to omit roasted green chiles if you prefer a milder dip.
- This dip is best served warm to enjoy the gooey melted cheeses.
- Sturdy tortilla chips work best for dipping to avoid breakage.
Keywords: Cheesy dip, Mexican bean dip, party dip, Tex-Mex, baked cheese dip, refried beans dip


