Chocolate Lava Cookies Recipe
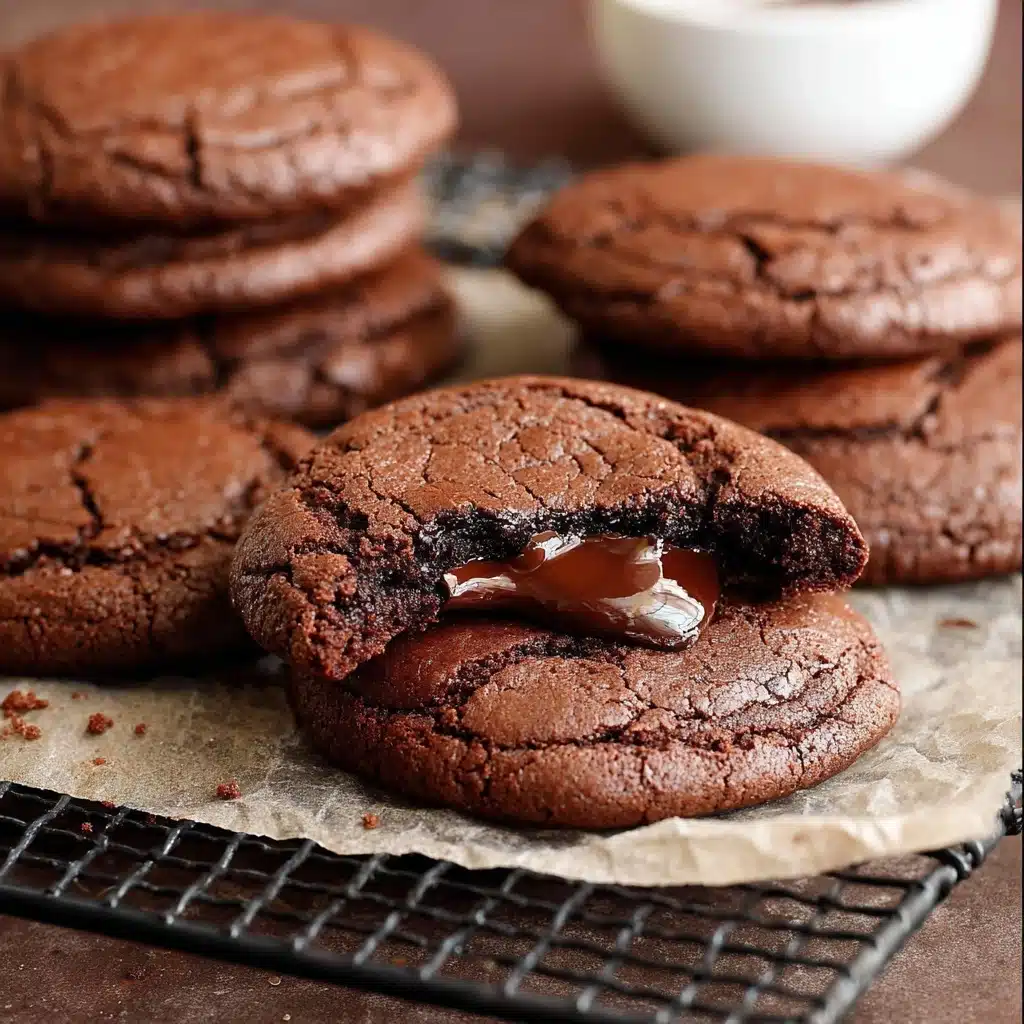
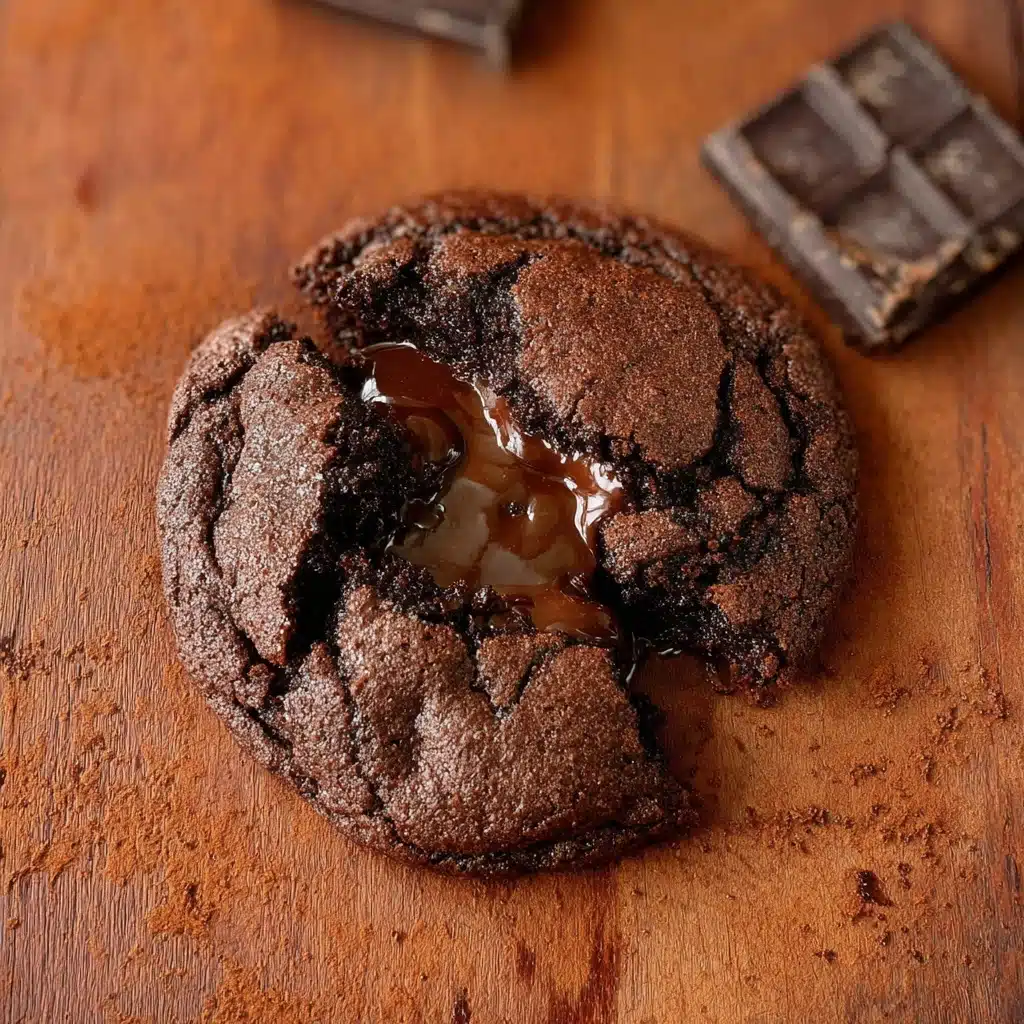
If you crave that blissful blend of fudgy chocolate and gooey decadence, these Chocolate Lava Cookies are about to become your new obsession. Imagine all the luscious drama of a molten chocolate lava cake baked into a perfectly portioned, handheld treat: crisp edges, soft centers, and a hidden molten chocolate core that oozes out with every bite. Whether you’re baking for a celebration or indulging in a cozy night in, this recipe delivers the magic of restaurant-style desserts right from your kitchen.
Ingredients You’ll Need
The beauty of these cookies lies in their straightforward ingredient list; each element plays a key role in achieving that signature chewy texture, deep chocolate flavor, and irresistible “lava” center. Here’s what you’ll need and why they matter.
- Salted Butter: Adds richness, ensures tenderness, and balances the intense chocolate.
- Light Brown Sugar: Lends extra moisture and a caramel-like depth to reinforce the fudgy texture.
- Granulated Sugar: Helps the cookies spread and gives the edges structure.
- Large Egg (room temperature): Binds everything together and keeps the inside soft and pillow-like.
- Pure Vanilla Extract: Rounds out the chocolate with warm, aromatic notes.
- All Purpose Flour: Provides the base and holds all the gooey chocolate in check.
- Cocoa Powder (Dutch process preferred): Delivers that deep, complex, café-worthy chocolate flavor.
- Baking Soda: Just enough lift for a soft center and lightly crackled crust.
- Salt: Enhances the chocolate and makes all the flavors pop.
- Easy One Pot Hot Fudge Sauce: The heart of every lava pocket; make it in advance for best results.
- Extra Cocoa Powder: Used to coat the fudge filling, sealing in gooeyness and adding another chocolatey dimension.
How to Make Chocolate Lava Cookies
Step 1: Prepare the Fudge Filling
Begin by making the Easy Hot Fudge Sauce using your favorite recipe or the one provided. Once the sauce comes together, whisk in the 2 tablespoons of cocoa powder to intensify that beautiful molten chocolate effect. Pour the mixture into a jar and refrigerate it for at least four hours; this allows the sauce to firm up, so you can scoop and encase it later without any mess. This step is the secret to the lava!
Step 2: Mix the Cookie Dough
In a large bowl, cream together the softened butter, brown sugar, and granulated sugar until light, fluffy, and inviting. Take your time here—the more airy and pale, the chewier your cookie. Mix in the egg and vanilla extract until fully blended, then sift together the flour, cocoa powder, baking soda, and salt in a separate bowl. Slowly fold the dry mixture into the wet ingredients, just until no flour pockets remain. Cover and chill for two hours. This chill ensures your cookies bake up thick with plenty of fudge inside.
Step 3: Shape the Lava Centers
Once your fudge filling is nicely chilled and set, scoop out generous teaspoons and roll them in a bowl of cocoa powder. This coating prevents the filling from leaking and blends seamlessly into the cookie. Place the fudge balls on a lined tray and freeze for at least 30 minutes—this step guarantees that molten core.
Step 4: Encase the Fudge and Form Cookies
Time to construct these beauties! Using a 1 ½-ounce cookie scoop, divide the dough into 14 equal portions. Roll each into a ball, then gently flatten into a 2 ½-inch disk with your palms. Place one frozen fudge ball in the center, then wrap the dough fully around, pinching to seal without any cracks. Repeat until every ball is hiding a fudgy secret, then chill the finished balls for 15 more minutes. This is your patience paying off!
Step 5: Preheat the Oven
Set your oven to 375°F. Line two large baking sheets with parchment paper, giving the cookies plenty of space to spread and ensuring the bottoms bake evenly.
Step 6: Bake, Cool, and Reveal the Lava
Place the chilled cookie dough balls on the trays, about three inches apart. Bake for 8 to 10 minutes, just until the edges are set and the surfaces look matte – don’t overbake! The cookies will continue to set up as they cool, locking in the magic of that gooey center. Allow them to cool completely on the tray before the big reveal.
How to Serve Chocolate Lava Cookies
Garnishes
A dusting of powdered sugar brings elegant, classic charm, while a sprinkle of flaky sea salt perfectly balances the cookies’ deep chocolate flavor. For a little extra pizzazz, consider a drizzle of warm chocolate or caramel sauce over the tops, or a handful of shaved chocolate for visual drama.
Side Dishes
The best companion to Chocolate Lava Cookies is a scoop of vanilla ice cream, which melts right into their warm centers. You can also serve them with fresh berries for a pop of color and tartness, or a dollop of lightly sweetened whipped cream to cut through the richness.
Creative Ways to Present
Show off your cookies on a rustic wooden board with little bowls of extra fudge sauce and fresh fruit, or plate each cookie individually with a quenelle of ice cream and an edible flower. For a party, serve the cookies in baking parchment wrappers for a “grab and go” molten treat. However you present them, the moment you break one open and that fudge pours out, all eyes will be on your masterpiece.
Make Ahead and Storage
Storing Leftovers
Keep any uneaten Chocolate Lava Cookies in an airtight container at room temperature for up to two days. The insides will remain moist and fudgy, though the lava effect is most dramatic when freshly baked. If you can resist, they’re even better on day two as the flavors develop!
Freezing
You can freeze unbaked, filled dough balls for up to one month. Place them on a tray until solid, then transfer to a zip-top freezer bag. When ready to bake, pop them straight from freezer to oven, adding one or two extra minutes to the baking time—your future self will thank you for a stash of homemade chocolate lava magic.
Reheating
If your baked cookies have cooled and you want to recreate that molten center, microwave each cookie for 10–15 seconds. The core will become gloriously gooey again, just like straight from the oven.
FAQs
Why is my fudge filling leaking out during baking?
If the dough isn’t sealed tightly around the fudge center, or if cracks form while wrapping, the filling can sneak out into the baking tray. Make sure the chilled cookie dough fully envelops the fudge ball and gently pinch closed any holes before baking.
Can I use store-bought hot fudge for the lava center?
You can, but homemade hot fudge with extra cocoa powder will set up thicker and guarantee a gooier, richer “lava” effect. Store-bought sauces may be too runny, so chill them well before using or opt for a recipe with a similar consistency.
What’s the difference between Dutch-processed and natural cocoa powder in this recipe?
Dutch-processed cocoa powder, with its deeper color and mellower flavor, provides a decadent, bakery-worthy chocolate note in Chocolate Lava Cookies. If using natural cocoa, the flavor will be brighter and slightly more acidic, but still delicious!
Can I make these cookies smaller or larger?
Absolutely! Just adjust the baking time accordingly: smaller cookies will need a minute or two less, and larger ones a little more. Remember, the signature lava effect works best when the dough wraps snugly around the fudge center, no matter the size.
How do I know when Chocolate Lava Cookies are done?
The cookies should look set around the edges and the tops should turn matte, but the centers will still feel just slightly soft when gently pressed. Don’t overbake: this is the magic window for the perfect molten core!
Final Thoughts
If you’re searching for a show-stopping chocolate dessert that feels special but is secretly easy, these Chocolate Lava Cookies will dazzle every time. Share them fresh and warm, and watch everyone fall in love with that molten surprise at the center. Don’t wait for a special occasion—bring a little lava magic into your weeknight and bake up a batch soon!
PrintChocolate Lava Cookies Recipe
Indulge in the rich, gooey goodness of these Chocolate Lava Cookies that are a delightful treat for any chocolate lover. With a soft cookie exterior and a molten fudge center, these cookies are sure to impress!
- Prep Time: 30 minutes
- Cook Time: 10 minutes
- Total Time: 4 hours 55 minutes
- Yield: 14 cookies 1x
- Category: Dessert
- Method: Baking
- Cuisine: American
- Diet: Vegetarian
Ingredients
Cookies:
- ½ cup (113g) salted butter, softened
- ½ cup (110g) packed light brown sugar
- ⅓ cup (65g) granulated sugar
- 1 large egg (at room temperature)
- 1 tsp (5ml) pure vanilla extract
- 1 ¼ cups (180g) all-purpose flour
- ⅓ cup (28g) cocoa powder
- ¼ tsp baking soda
- ¼ tsp salt
Fudge Filling:
- 1 x recipe for Easy One Pot Hot Fudge Sauce
- 2 tbsp (12g) cocoa powder
Instructions
- Make the fudge filling. Prepare the Easy Hot Fudge Sauce and whisk in cocoa powder. Refrigerate until set.
- Make the cookie dough. Cream butter and sugars, mix in egg and vanilla. Sift dry ingredients, add to wet mixture, and refrigerate dough.
- Prepare fudge balls. Scoop fudge sauce, coat in cocoa, freeze. Portion dough, wrap fudge inside, and chill.
- Bake the cookies. Preheat oven, line trays, bake cookies until set. Cool on baking sheet.
Notes
- For a more intense chocolate flavor, use Dutch-process cocoa powder.
- Ensure the fudge filling is well chilled to prevent leakage during baking.
Nutrition
- Serving Size: 1 cookie
- Calories: 220
- Sugar: 15g
- Sodium: 120mg
- Fat: 10g
- Saturated Fat: 6g
- Unsaturated Fat: 3g
- Trans Fat: 0g
- Carbohydrates: 30g
- Fiber: 1g
- Protein: 2g
- Cholesterol: 35mg
Keywords: Chocolate Lava Cookies, Fudge-filled Cookies, Chocolate Desserts


